
Setup: BTCPay Server hosted on Bitcoin Aruba with Blink Wallet integration
Keep in Mind
- BTCPay Server: free open-source bitcoin project, not a "company"
- Bitcoin Aruba: independent BTCPay Server instance
- Blink: custodial bitcoin wallet mobile app (formerly Bitcoin Beach Wallet)
- Store vs Point of Sale: multiple Points of Sale can exist under one store
- Store: backend hub for settings
- Point of Sale: public-facing view that customers see
What You’ll Need
- Email address and new secure password: to create a BTCPay Server account
- Blink app: available on the App Store, Google Play, and App Gallery
- Email address or phone number: to create a Blink wallet
Decisions to Make
- Store name: name for backend hub, not automatically visible to customers
- Point of Sale name: name customers will see
- Currency preference: BTC, SATS or fiat options that will be displayed
- API key name: something that identifies this setup (e.g., "BTCPay Server + [Point of Sale name]")
- Tips, taxes, and discounts: toggle on or off as needed
Important
⚠️ Blink API key secrets will be generated only once; save them securely.
Get Started
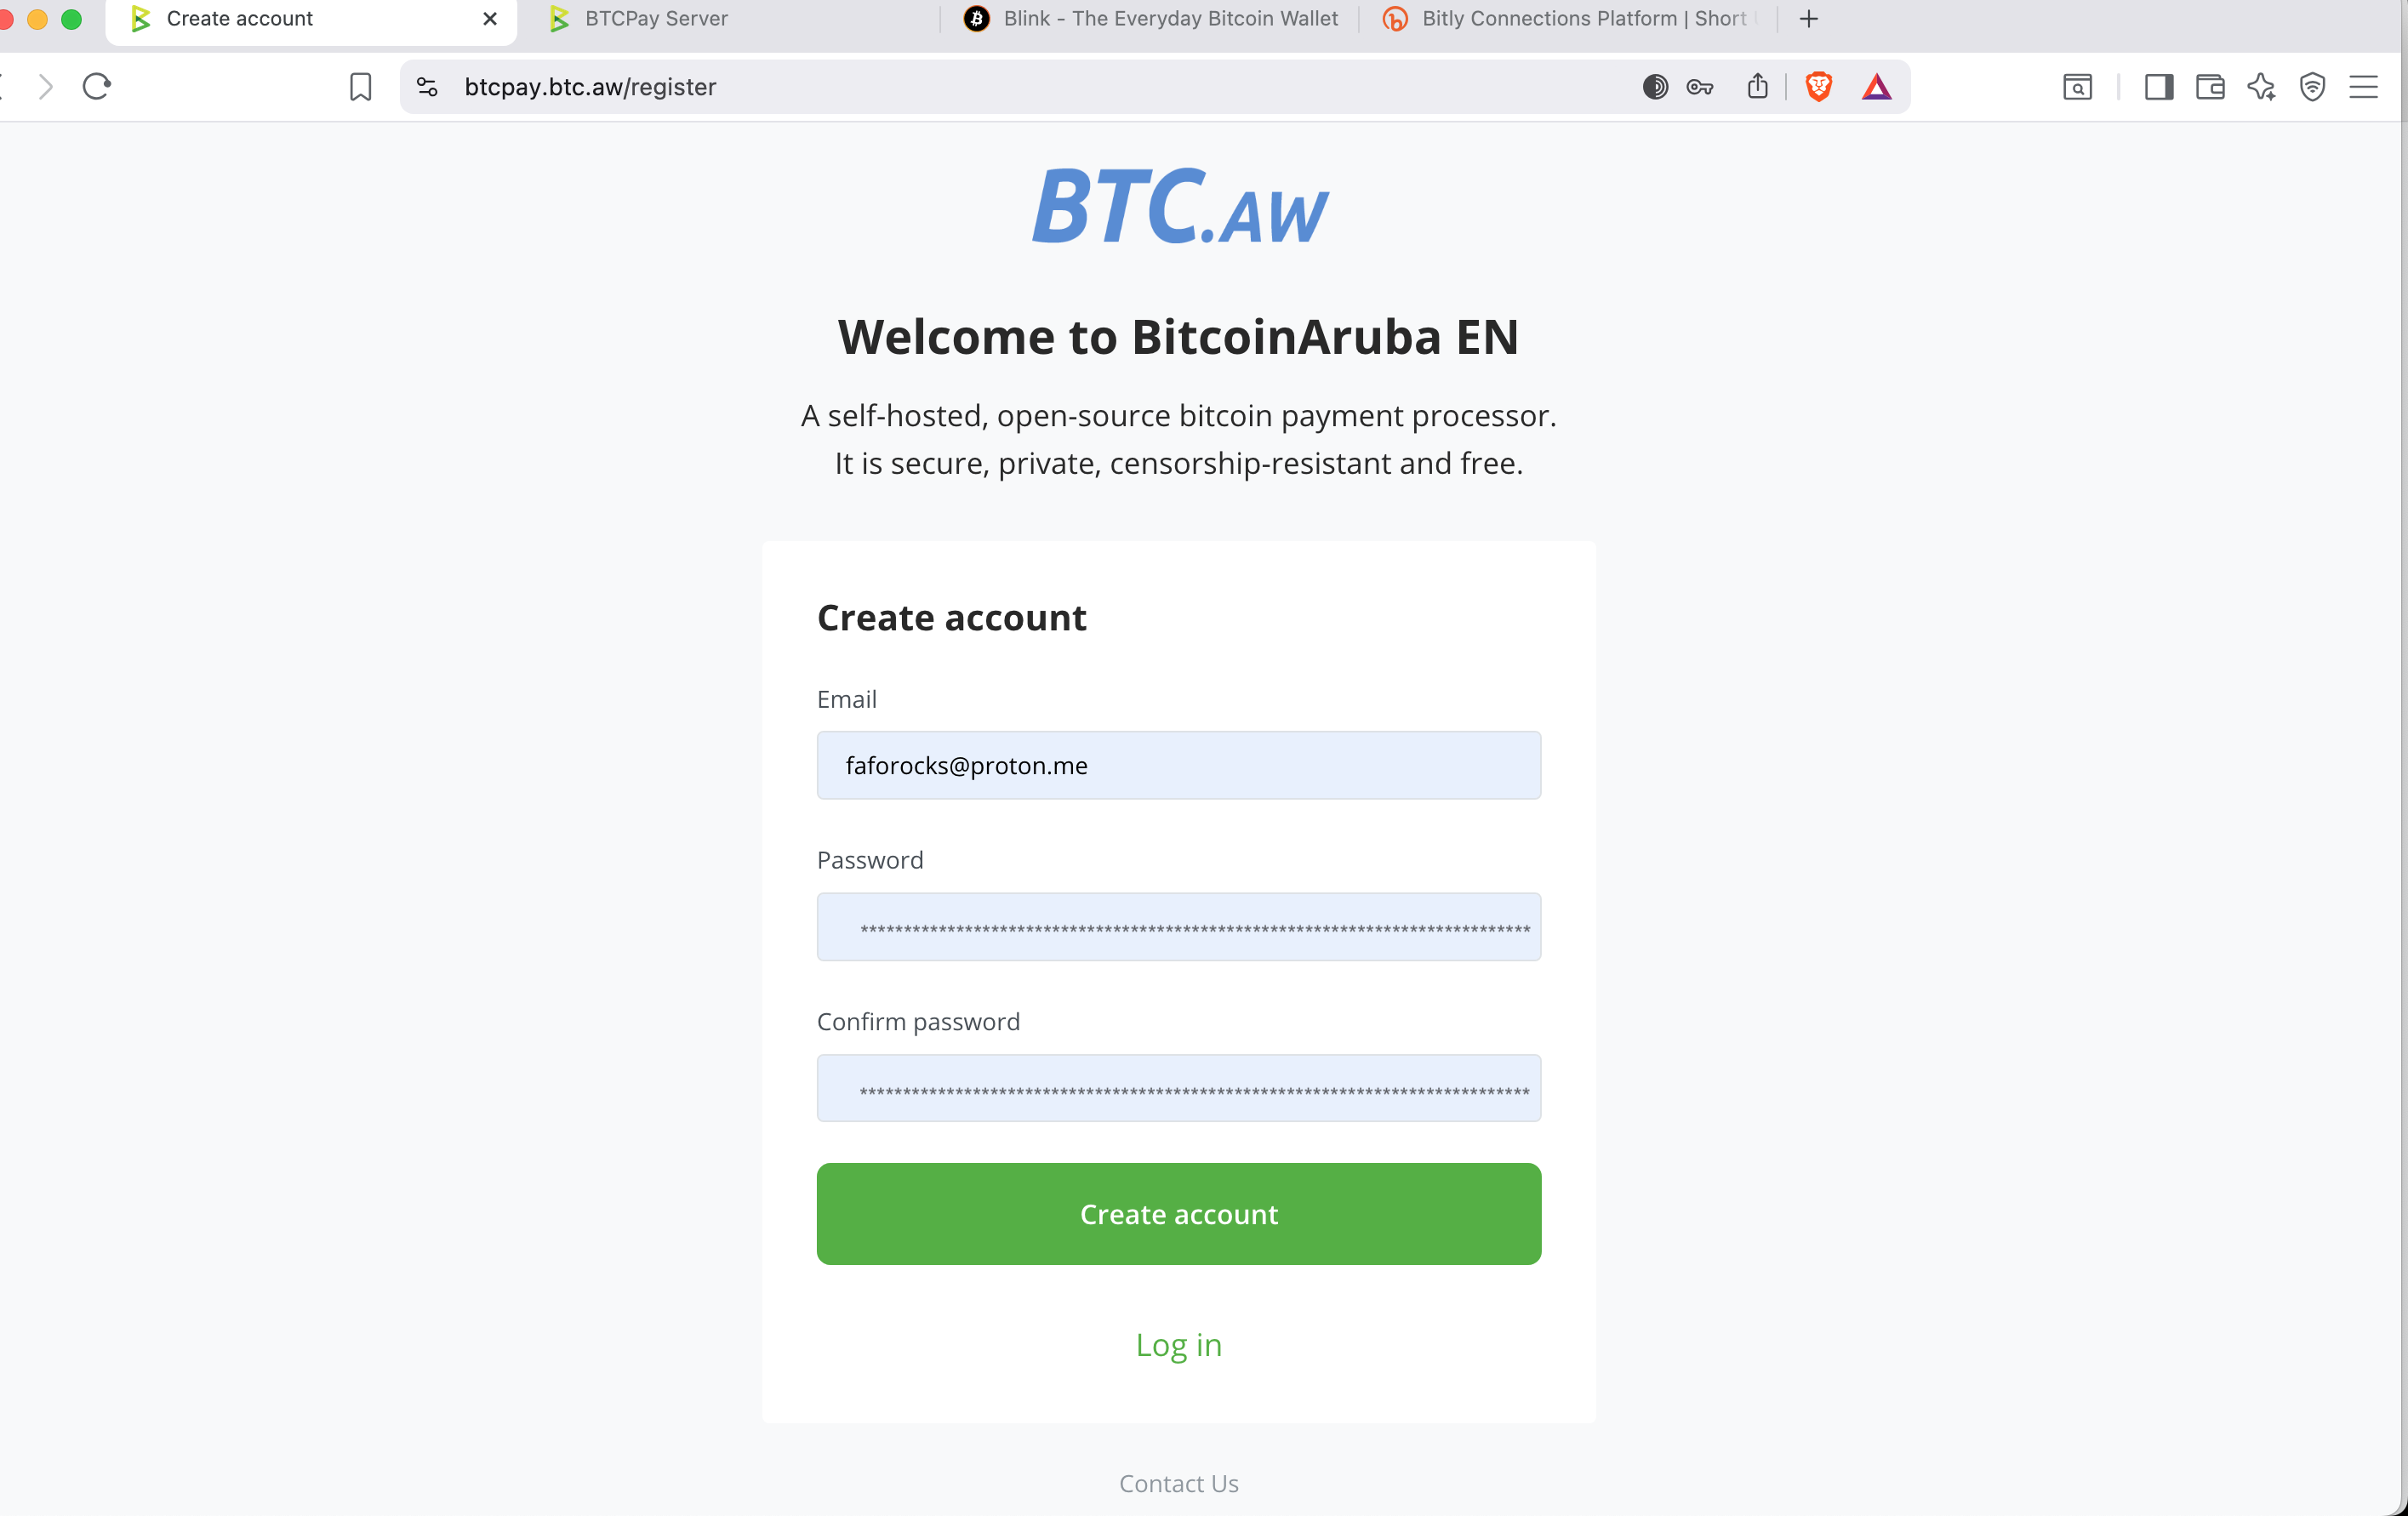
1. Create a BTCPay Server Account
- Go to: https://btcpay.btc.aw/register
- Sign up with your email and a secure password
- Click Create account
✅ BTCPay Server account created successfully
Note
ℹ️ This account is only for the Bitcoin Aruba BTCPay Server instance, there’s no global BTCPay Server login.
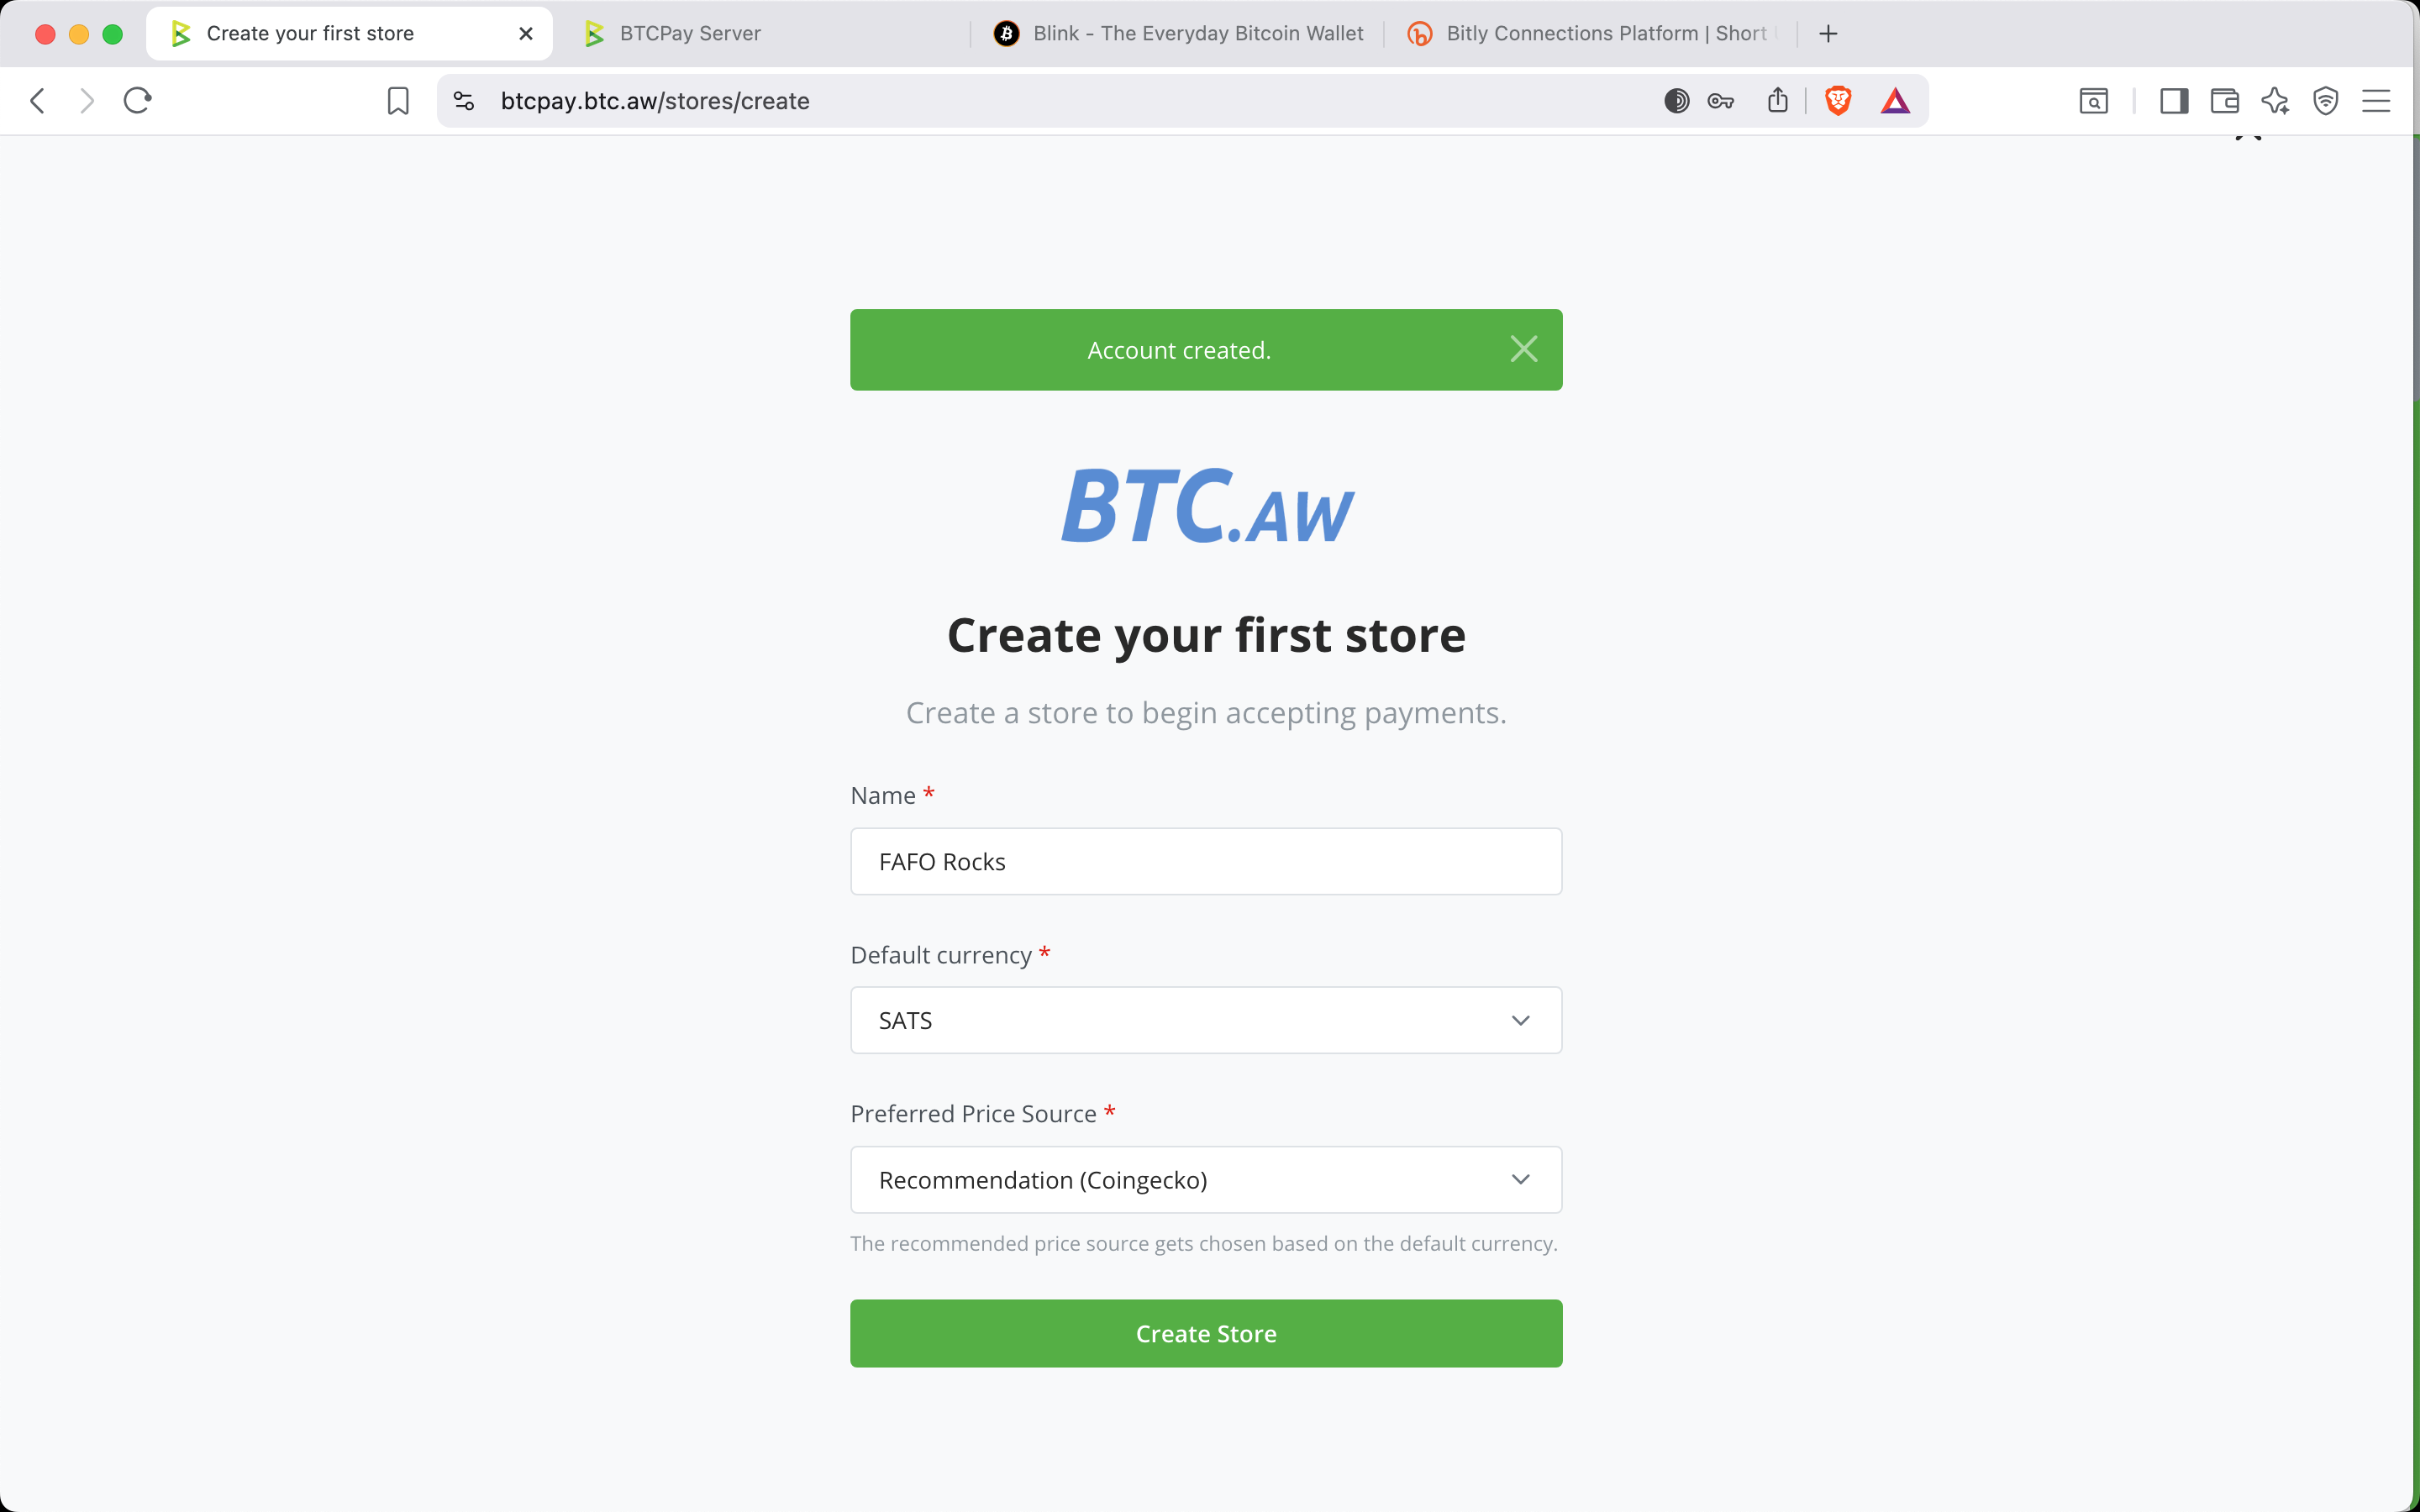
2. Create Your BTCPay Server Store
- Store Name: enter your store’s name
- Default Currency: select from BTC, SATS, or a choice of fiat
- Preferred Price Source: recommendations will be given
- Click Create Store
✅ BTCPay Server store created successfully
Note
ℹ️ Your store can have multiple Points of Sale. Store refers to the backend hub for settings.
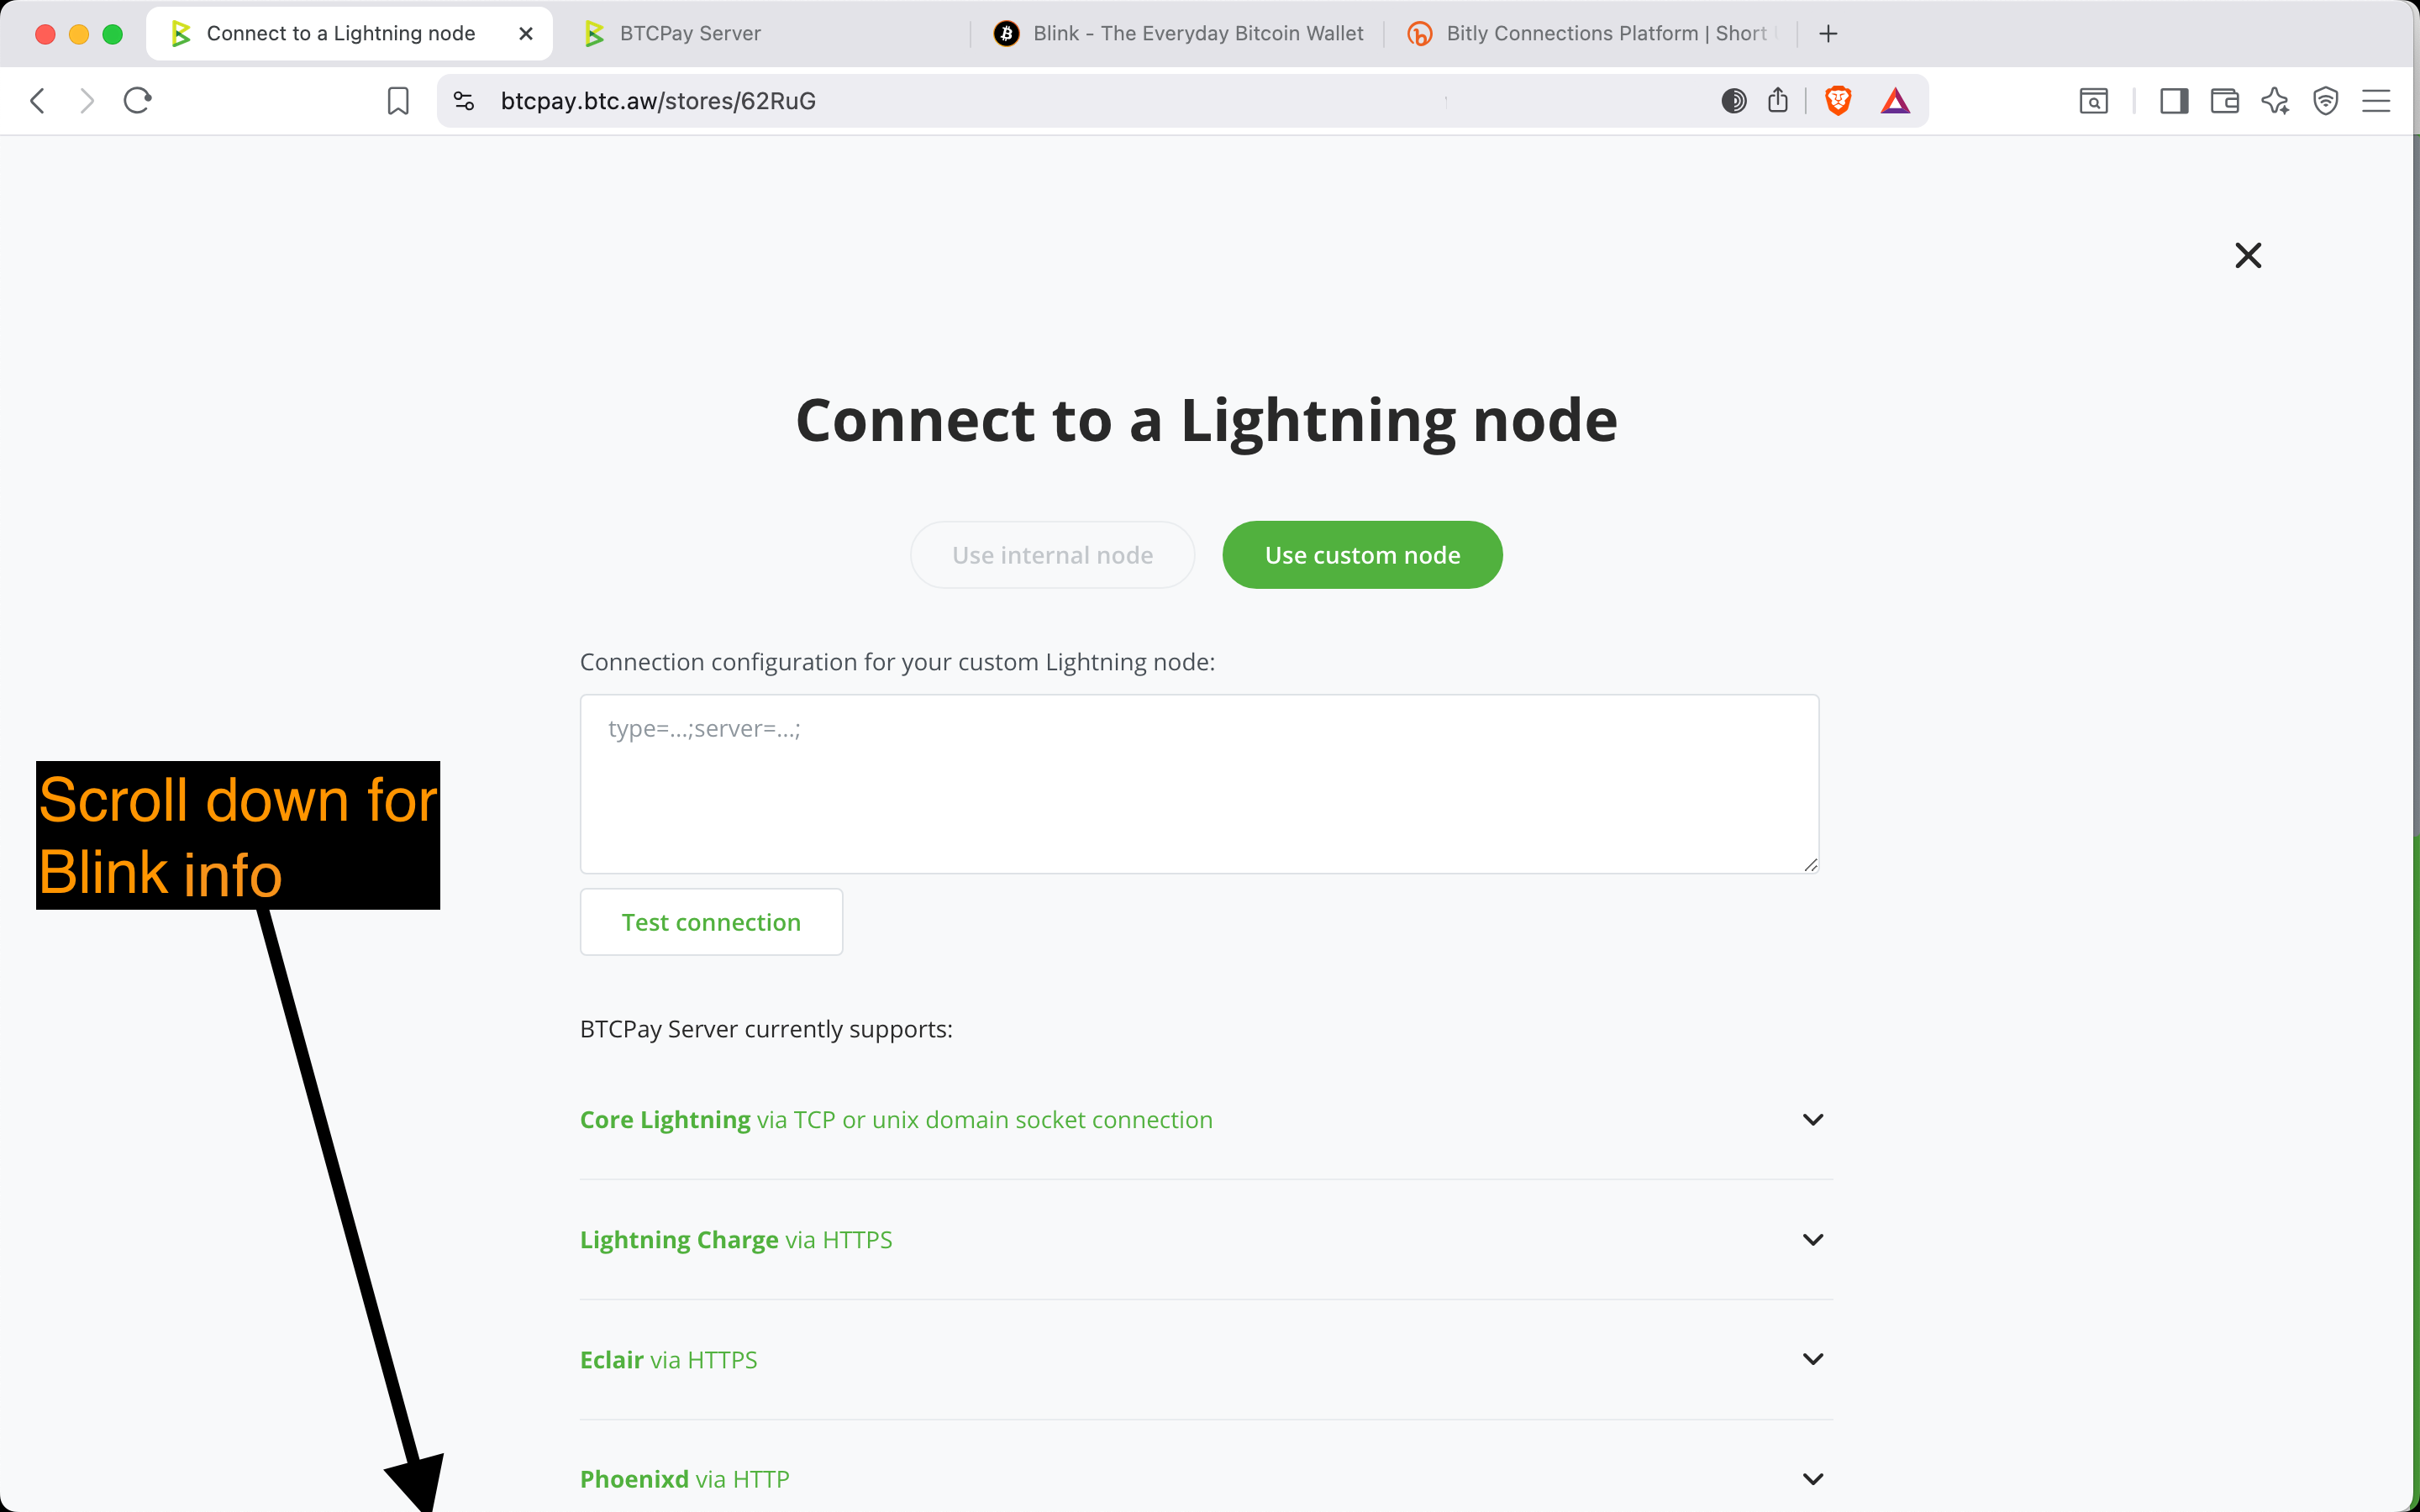
3. Connect to a Lightning Node
- From the sidebar, select: Wallets → Lightning
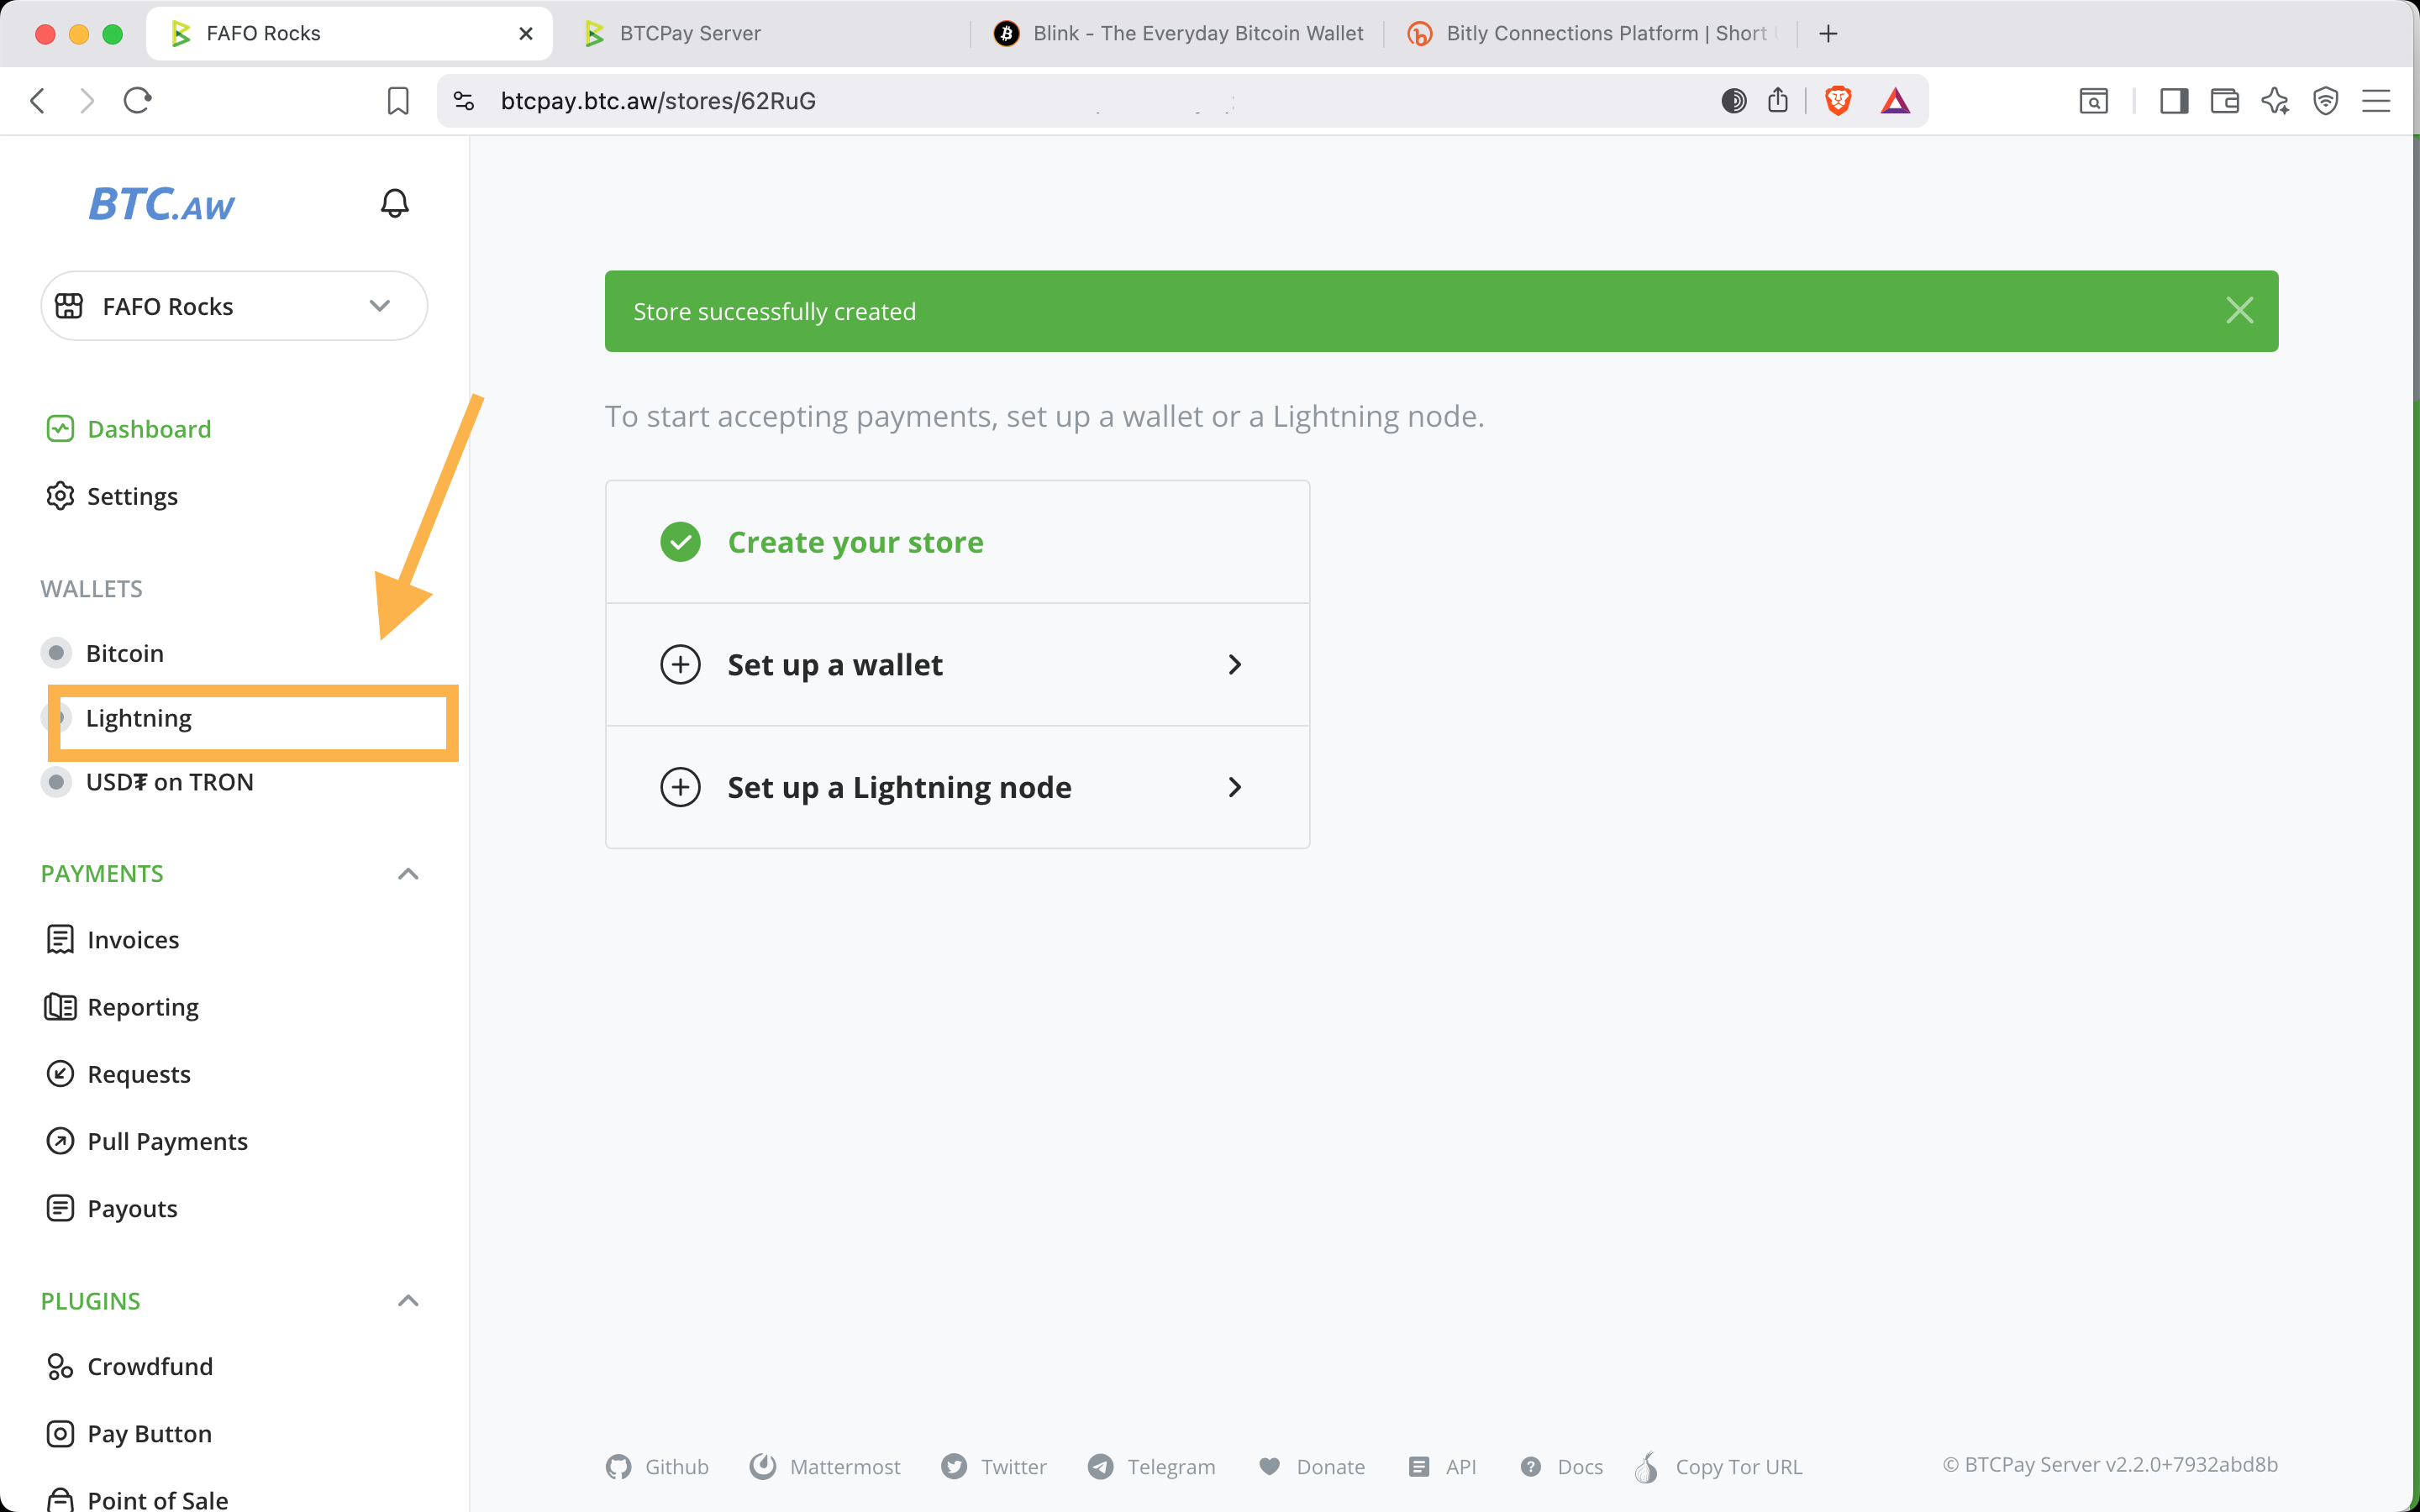
✅ You should see: “Connection configuration for your custom Lightning node”
Tip
📌 Leave this page open. You’ll return here in Step 9.
🔧 Set Up a Blink Wallet
4. Download Blink
- Go to: https://www.blink.sv
- Download the app for your device
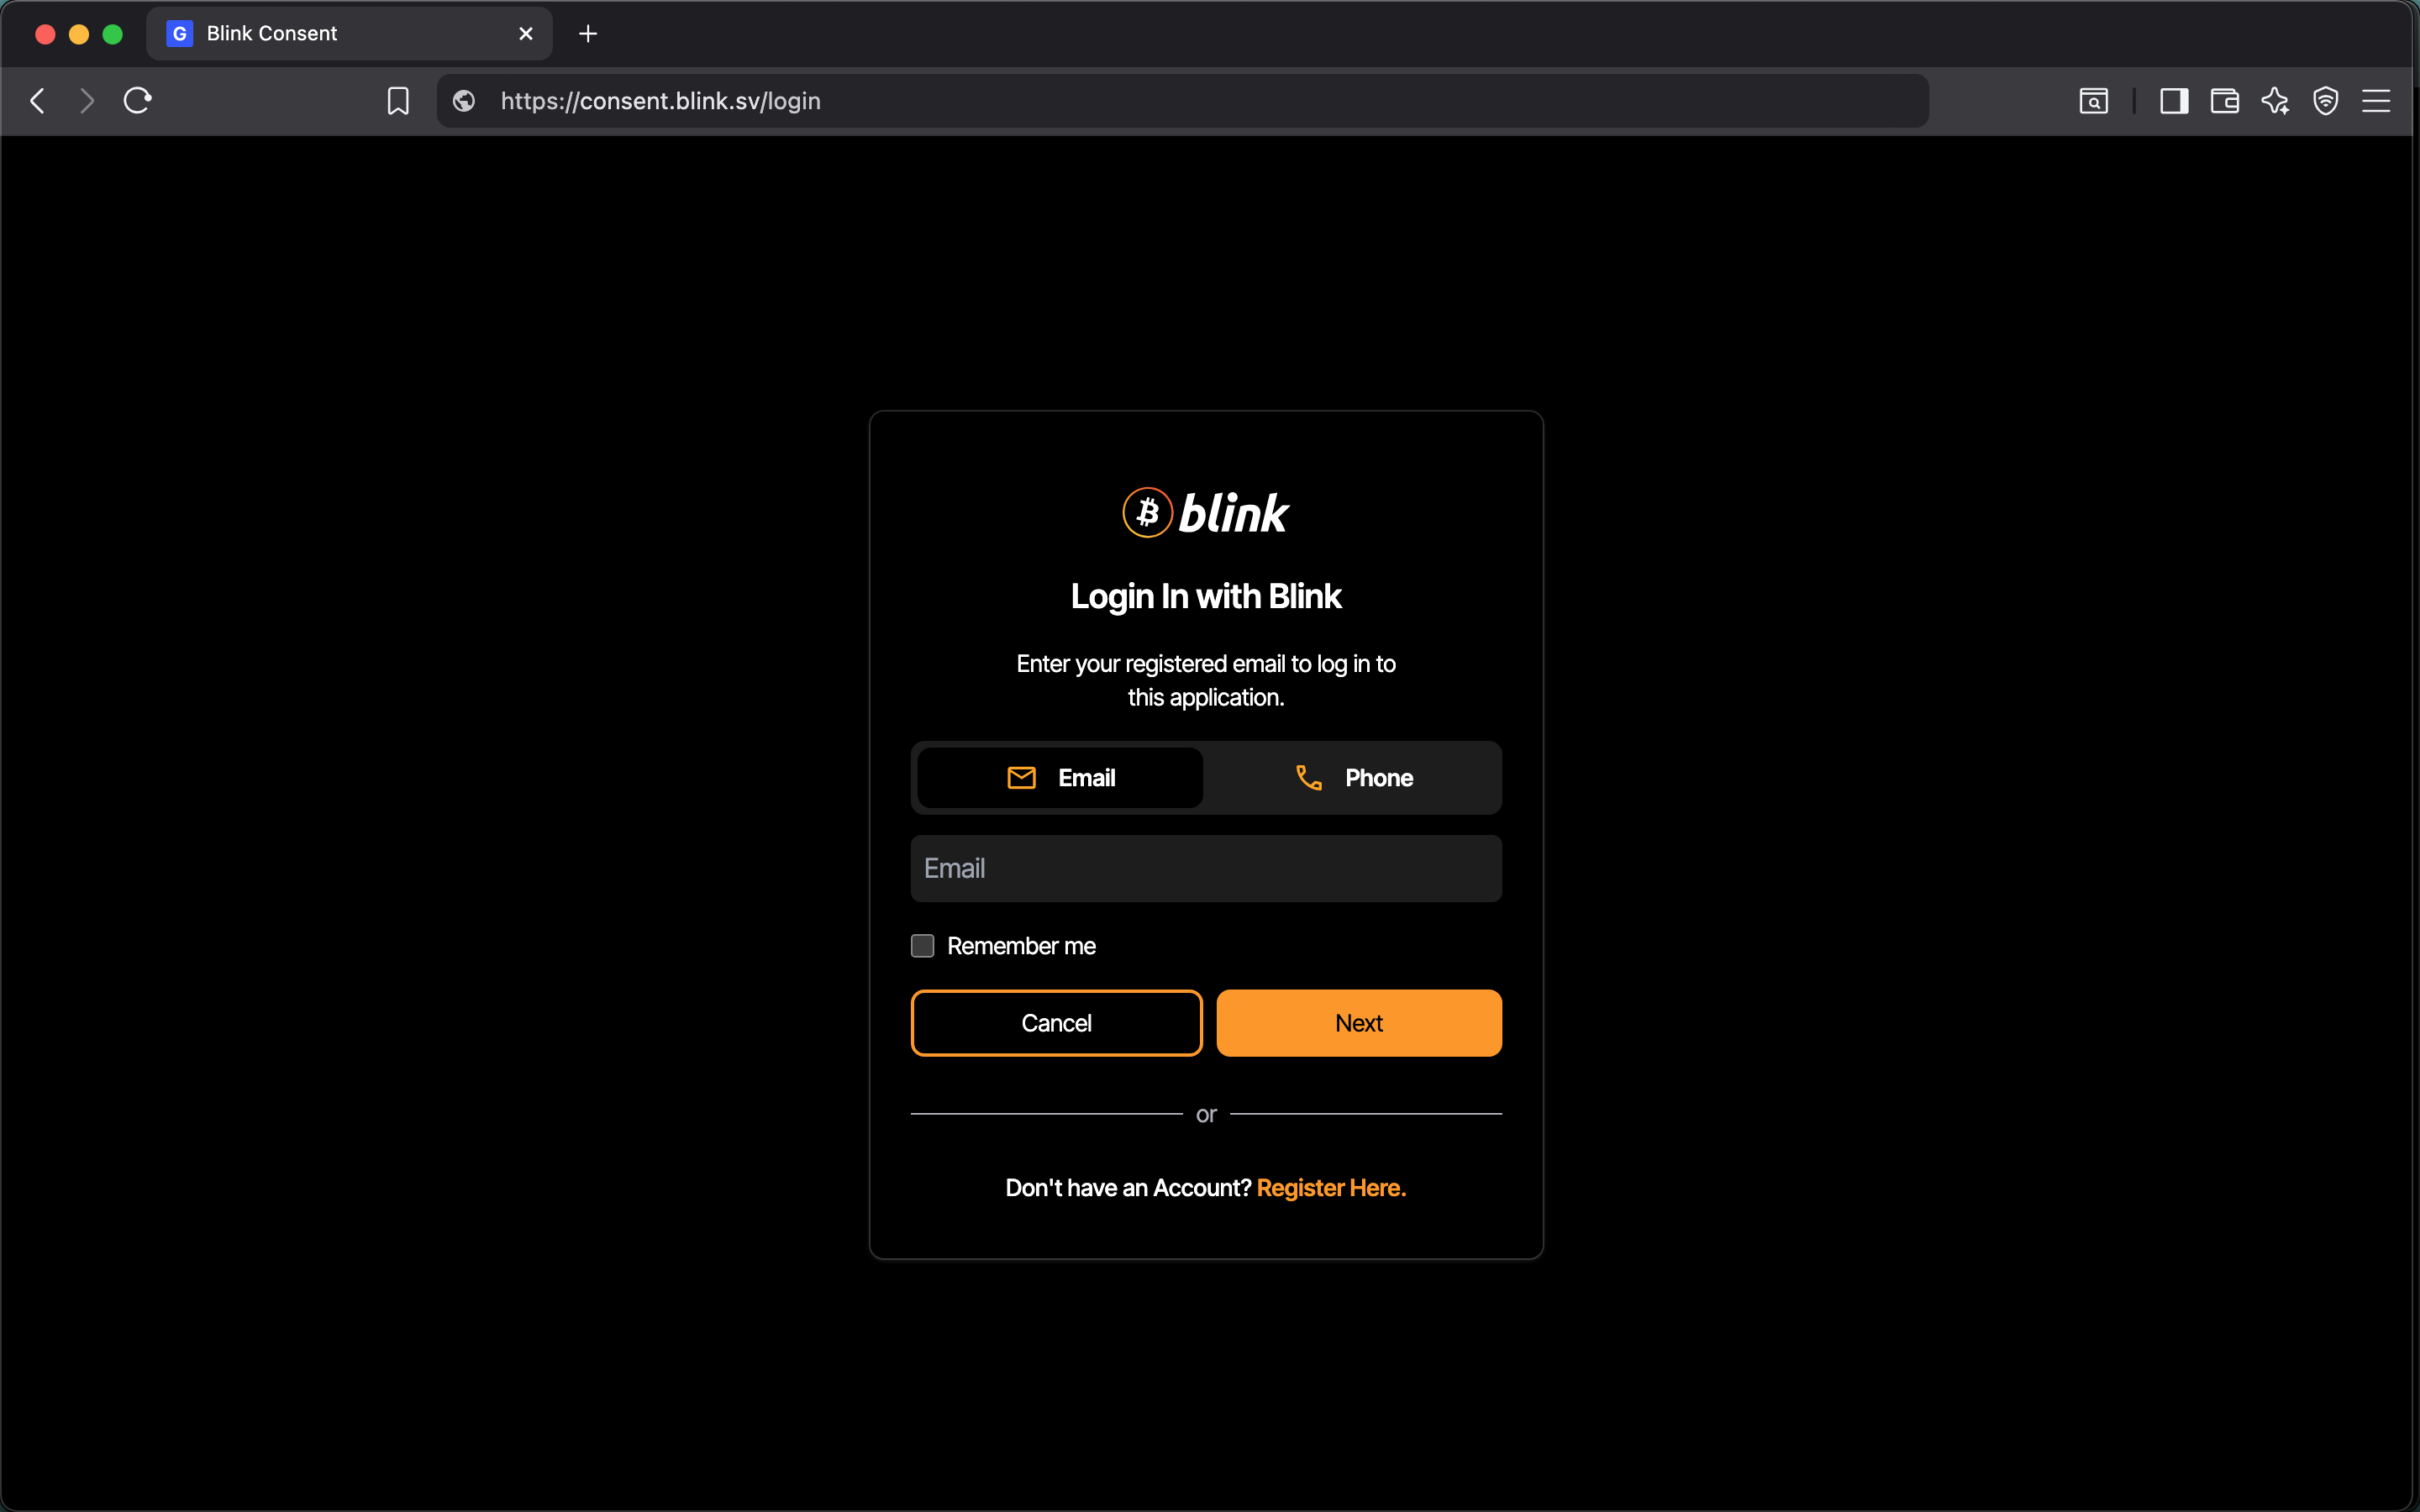
- Sign up with email or phone
Important
⚠️ Blink is a custodial wallet. It’s convenient for everyday payments, but you trade off control and security. DYOR and move sats to self-custody regularly.

5. Log in to Blink Dashboard
- Go to: https://dashboard.blink.sv
- Log in to your Blink account
Note
ℹ️ You will be asked to enter the verification code that is sent to your email or phone.
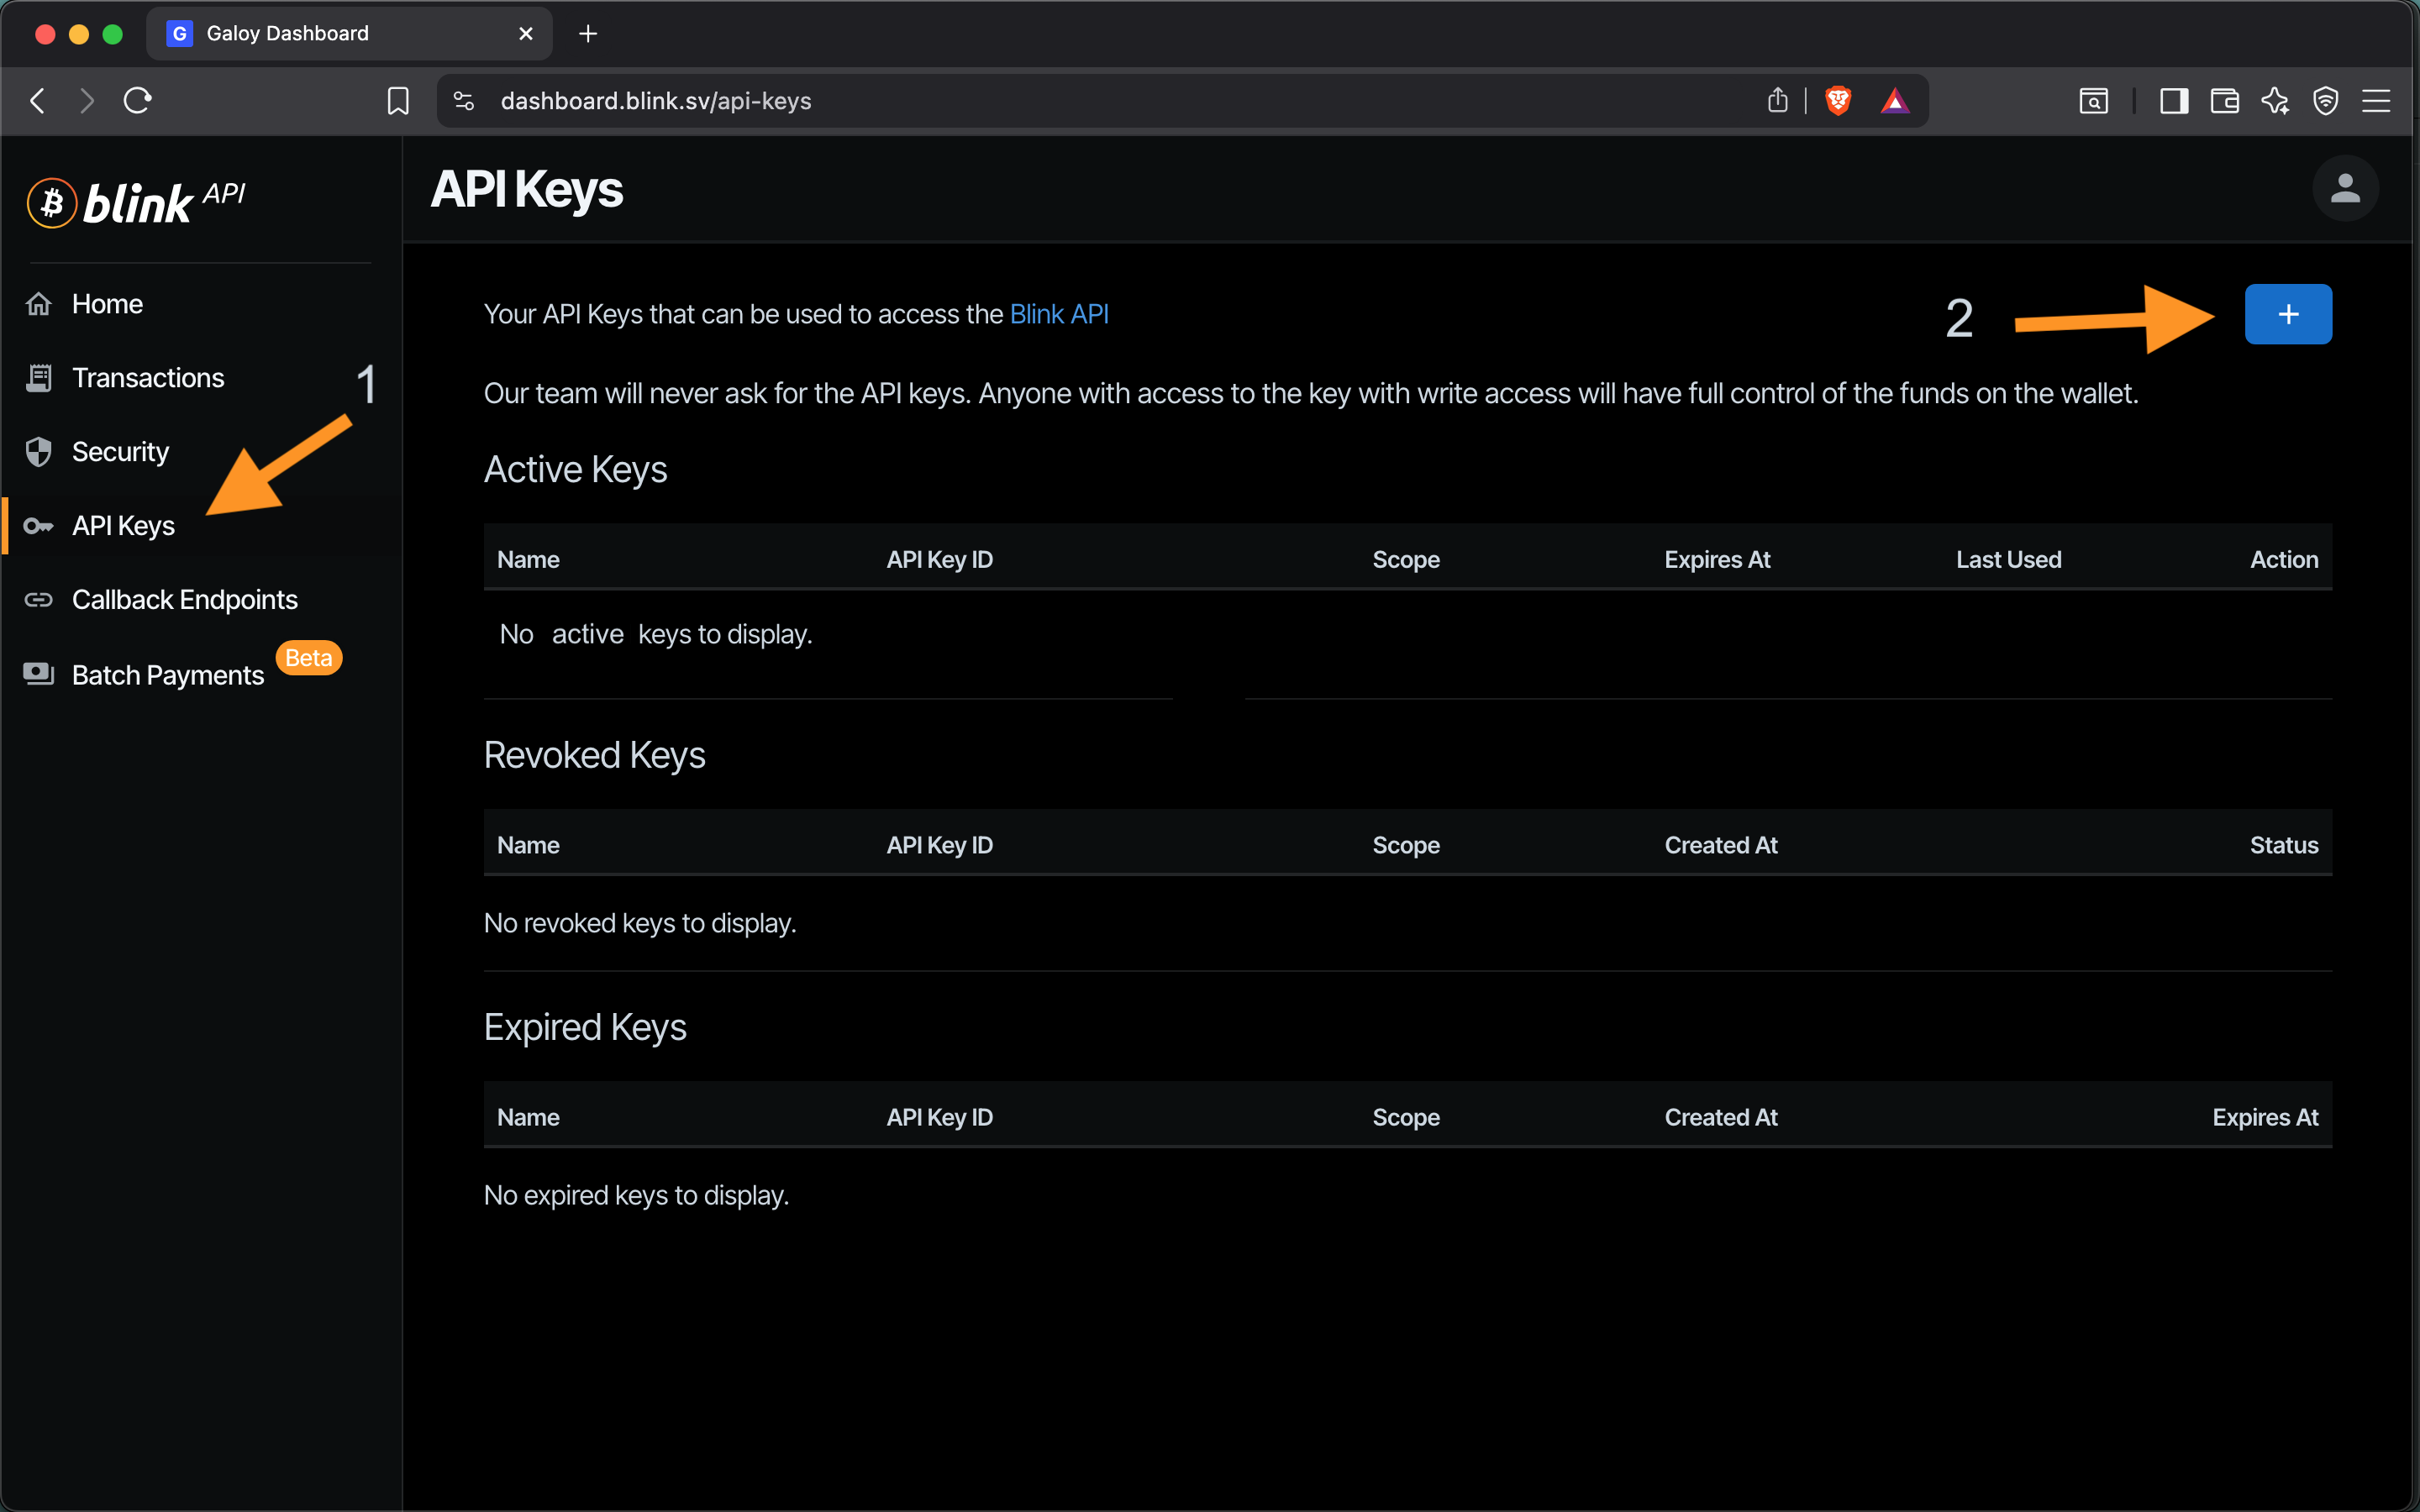
6. API Keys
In the Blink dashboard:
- From the sidebar, select: API Keys
- Click + to create one
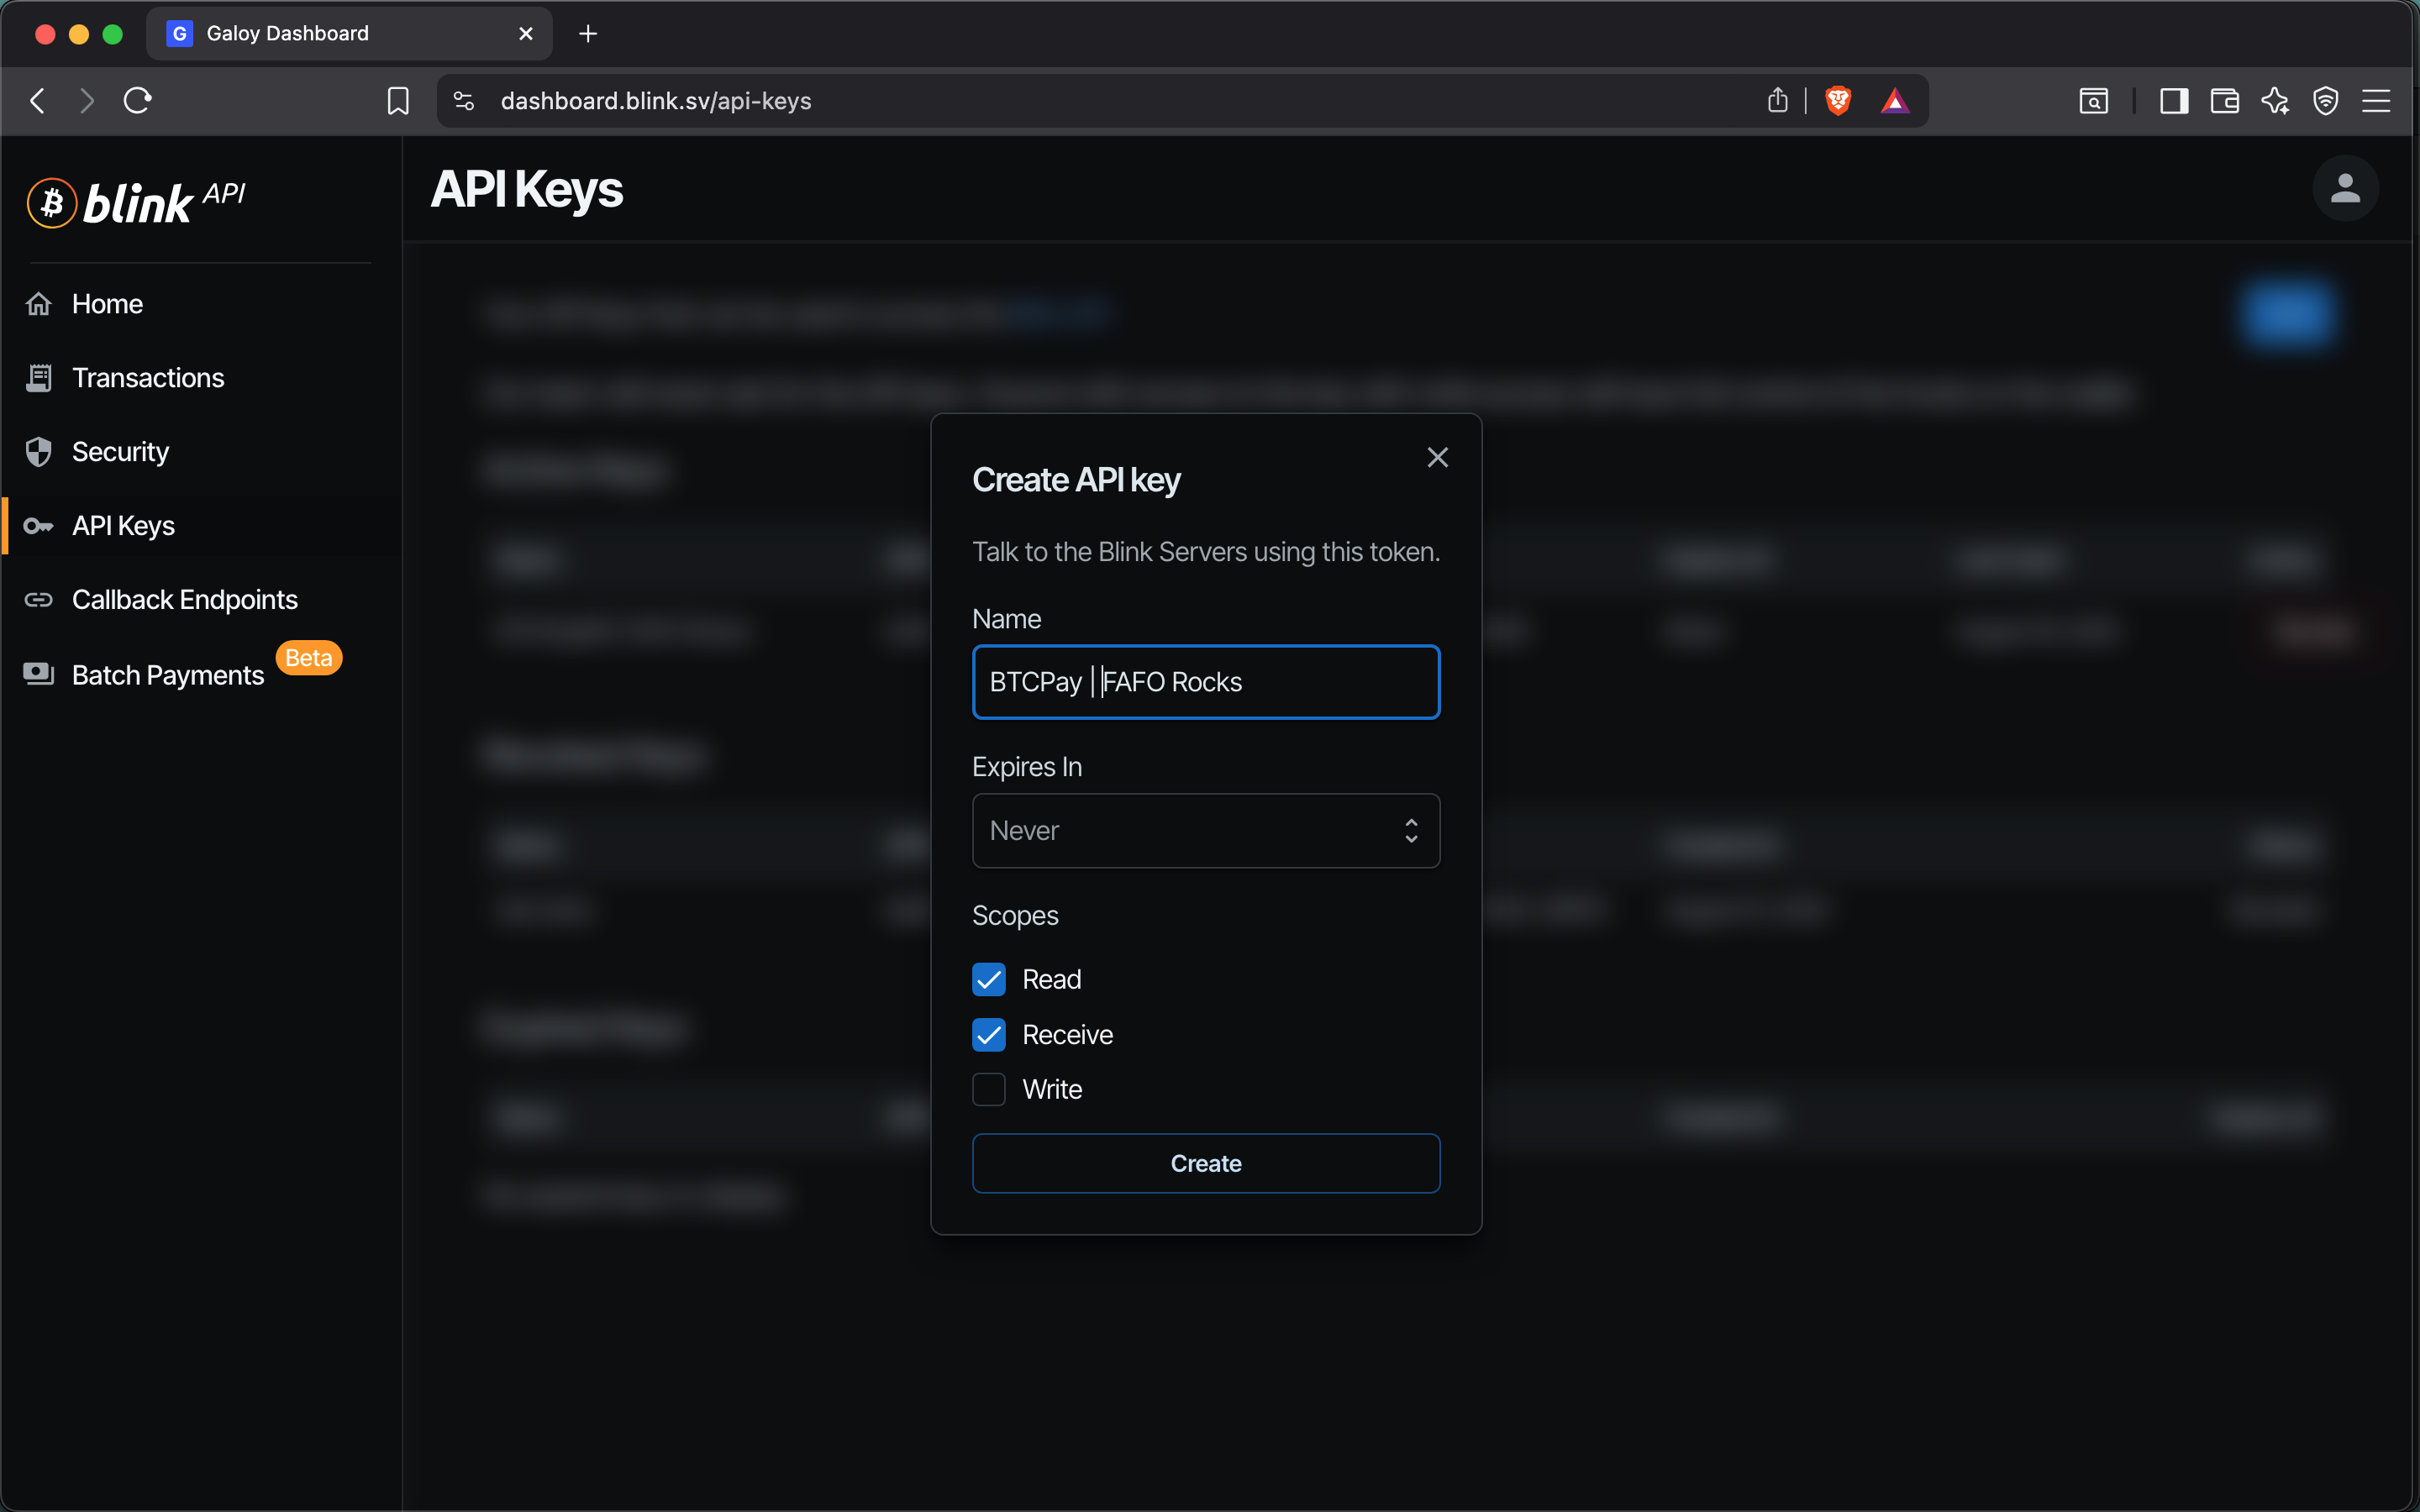
7. Create API Key
- Name: enter a name that helps you remember what this key is used for (e.g., "BTCPay Server + [Point of Sale name]")
- Expires in: select duration from the dropdown
- Select Read and Receive (to invoice and receive funds)
- Click Create
Important
⚠️ The BTCPay Server admin can access your API key. Selecting Write allows for funds to be sent.
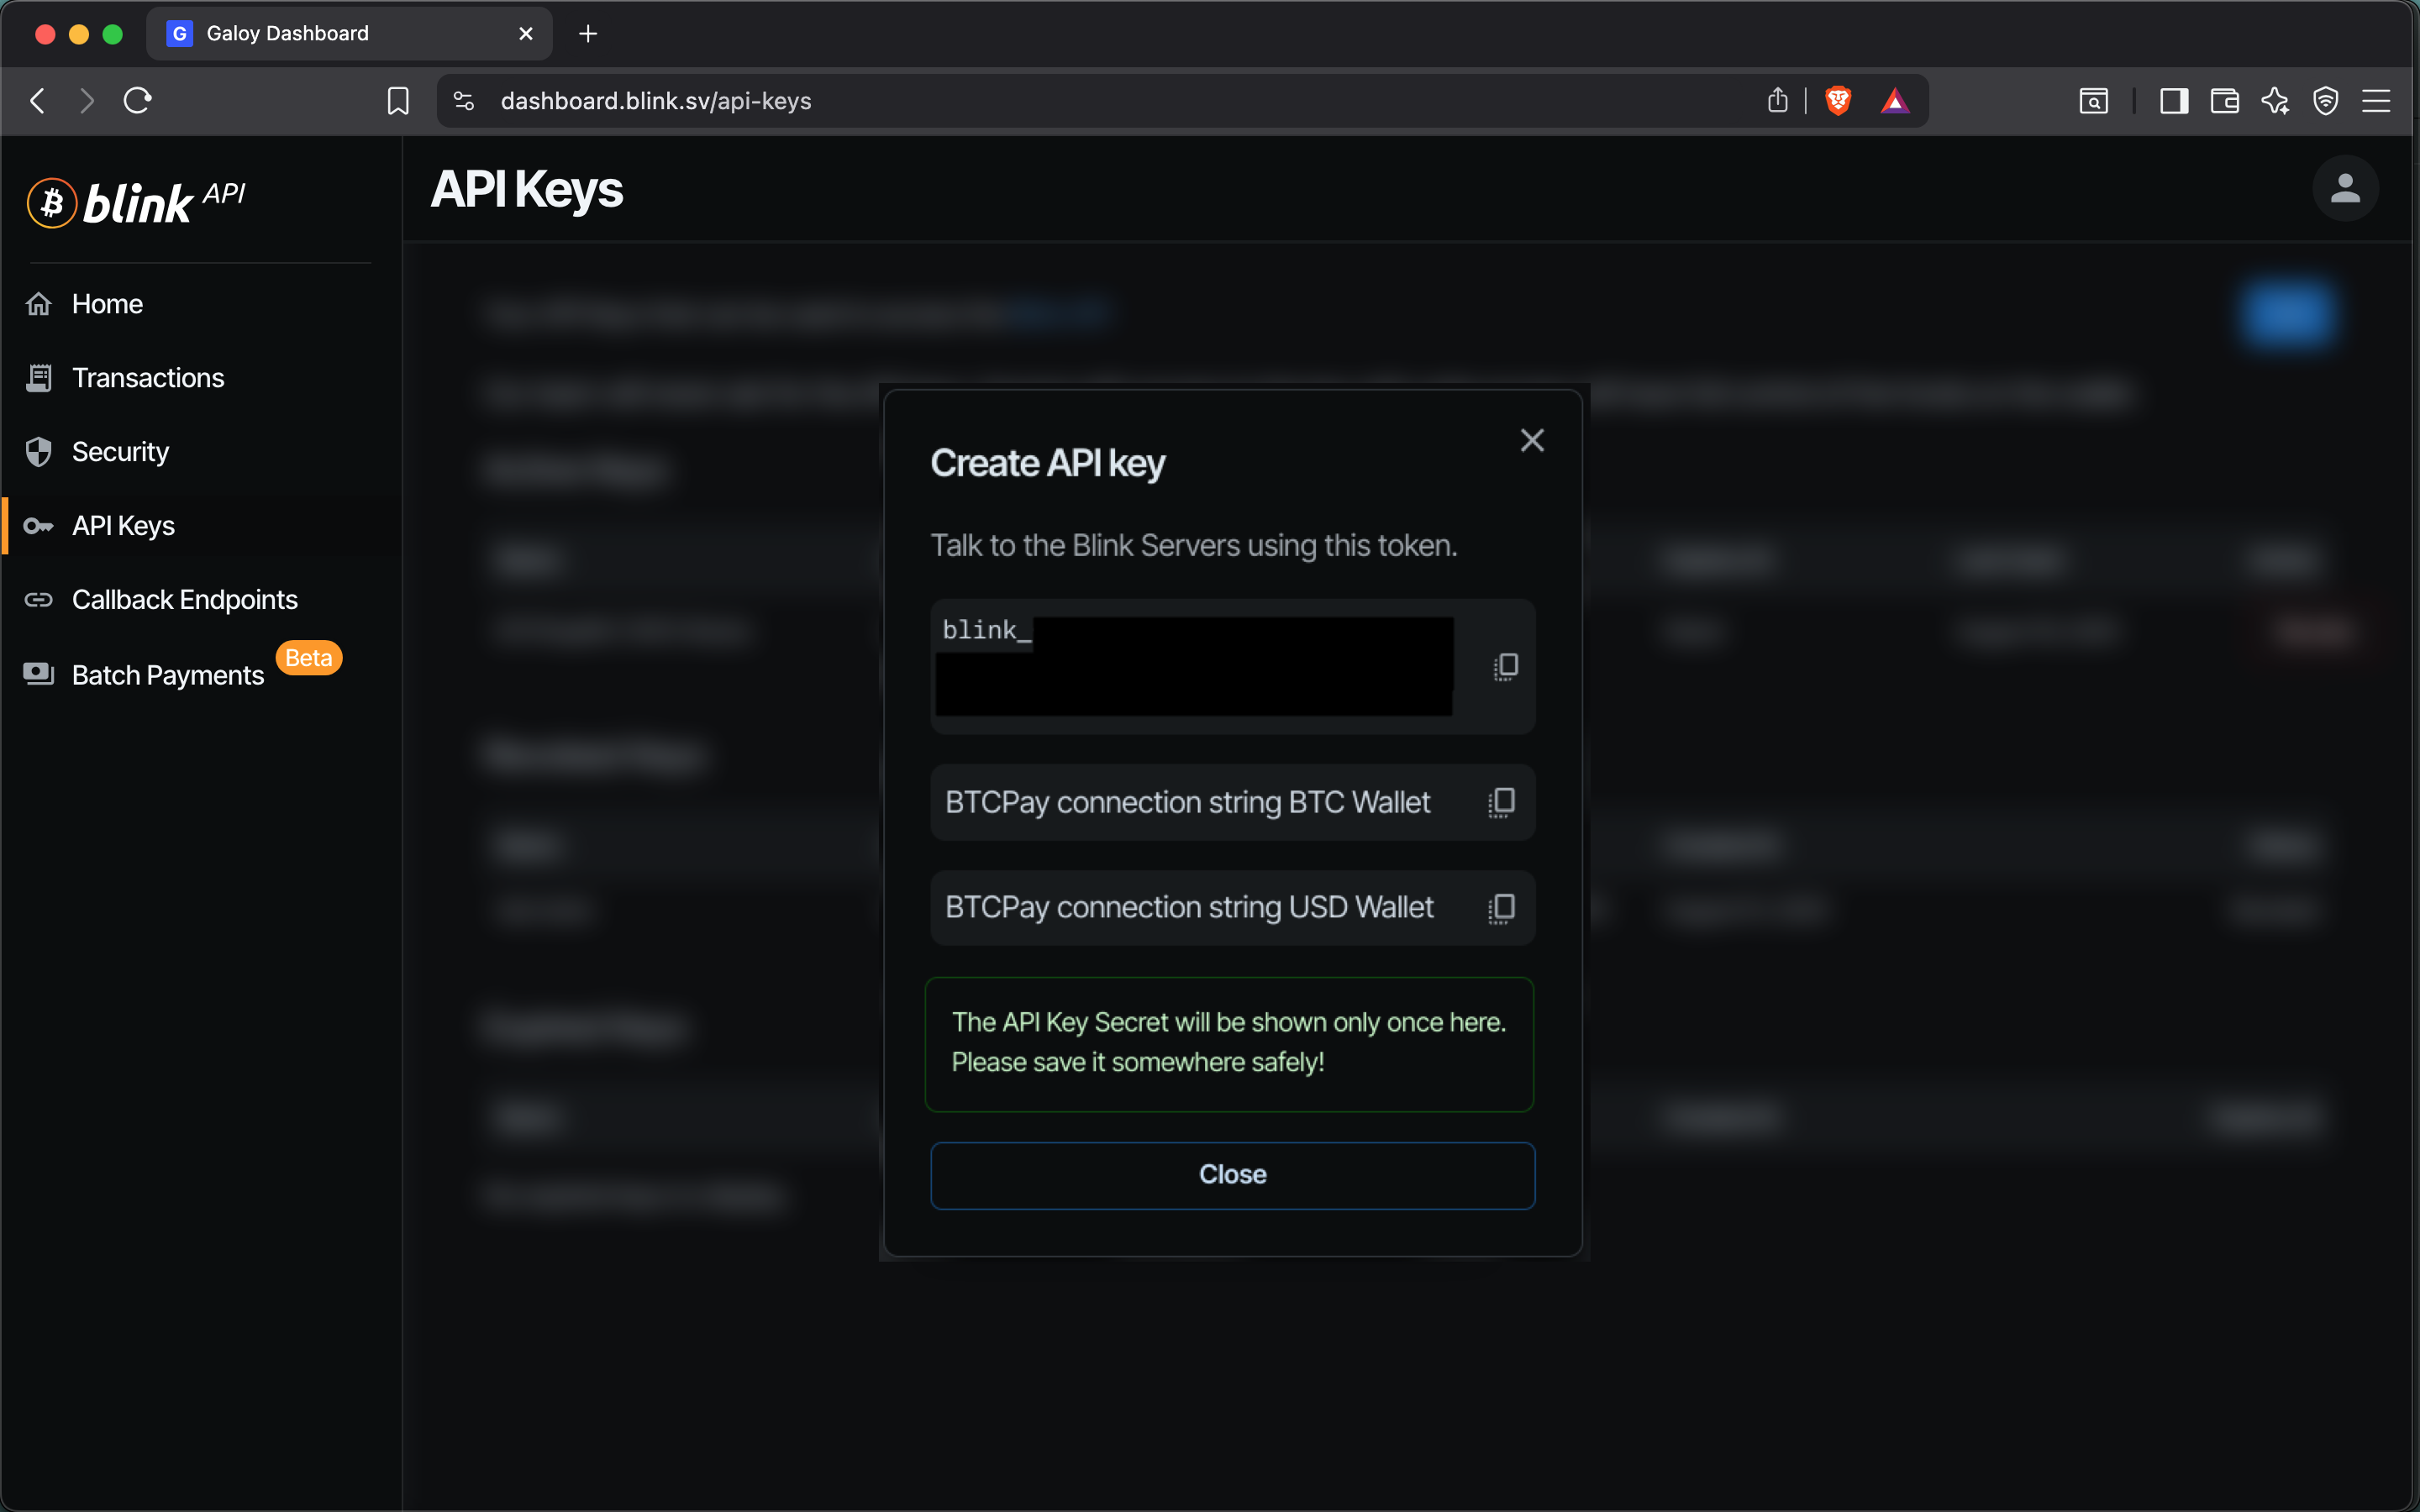
8. Save Your API Key Secrets
- Copy and save all 3 API key secrets:
- token
- BTCPay connection string BTC Wallet
- BTCPay connection string USD Wallet
- Once saved, click Close
Note
ℹ️ Only the “BTCPay connection string BTC Wallet” is used for this setup.
Important
⚠️ Blink API key secrets will be generated only once; save them securely.
🔗 Connect Blink to BTCPay Server
9. Paste API Connection String
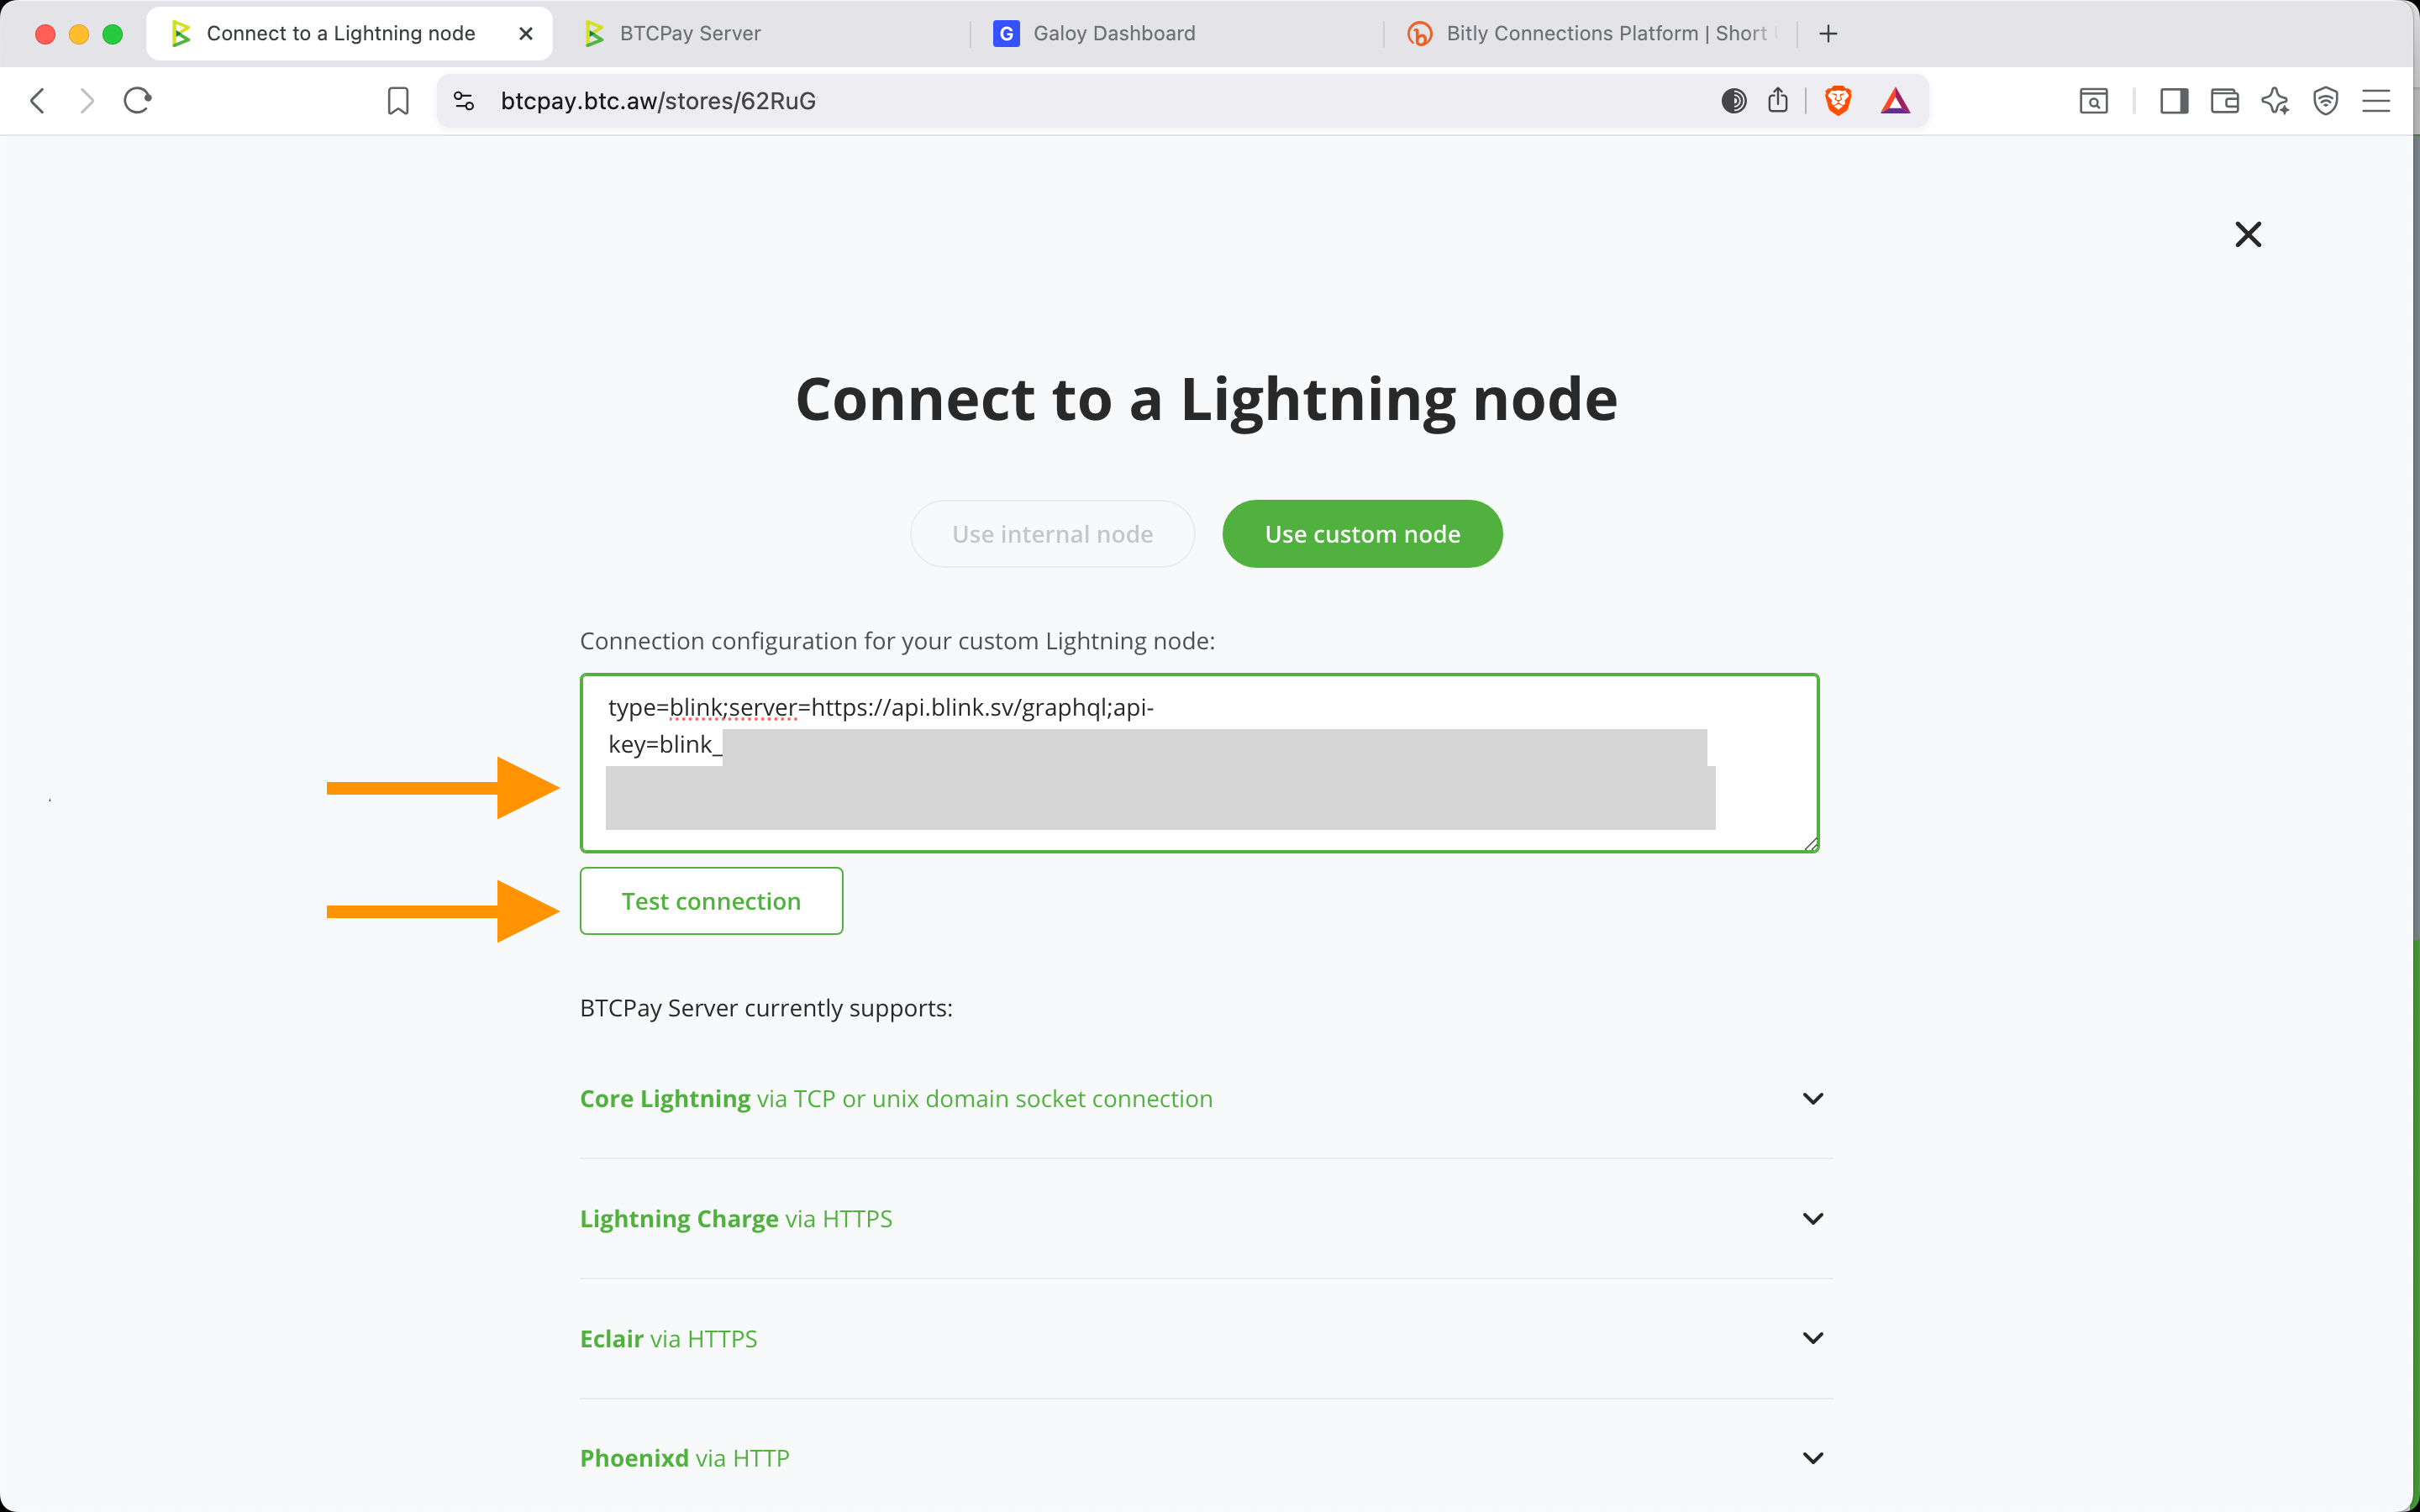
- Return to the BTCPay Server store page from Step 3
- Copy the API Key secret “BTCPay connection string BTC Wallet” and paste it into the connection box
It starts:
type=blink;server= https://api.blink.sv/graphql;api-key=blink_XXXXXX
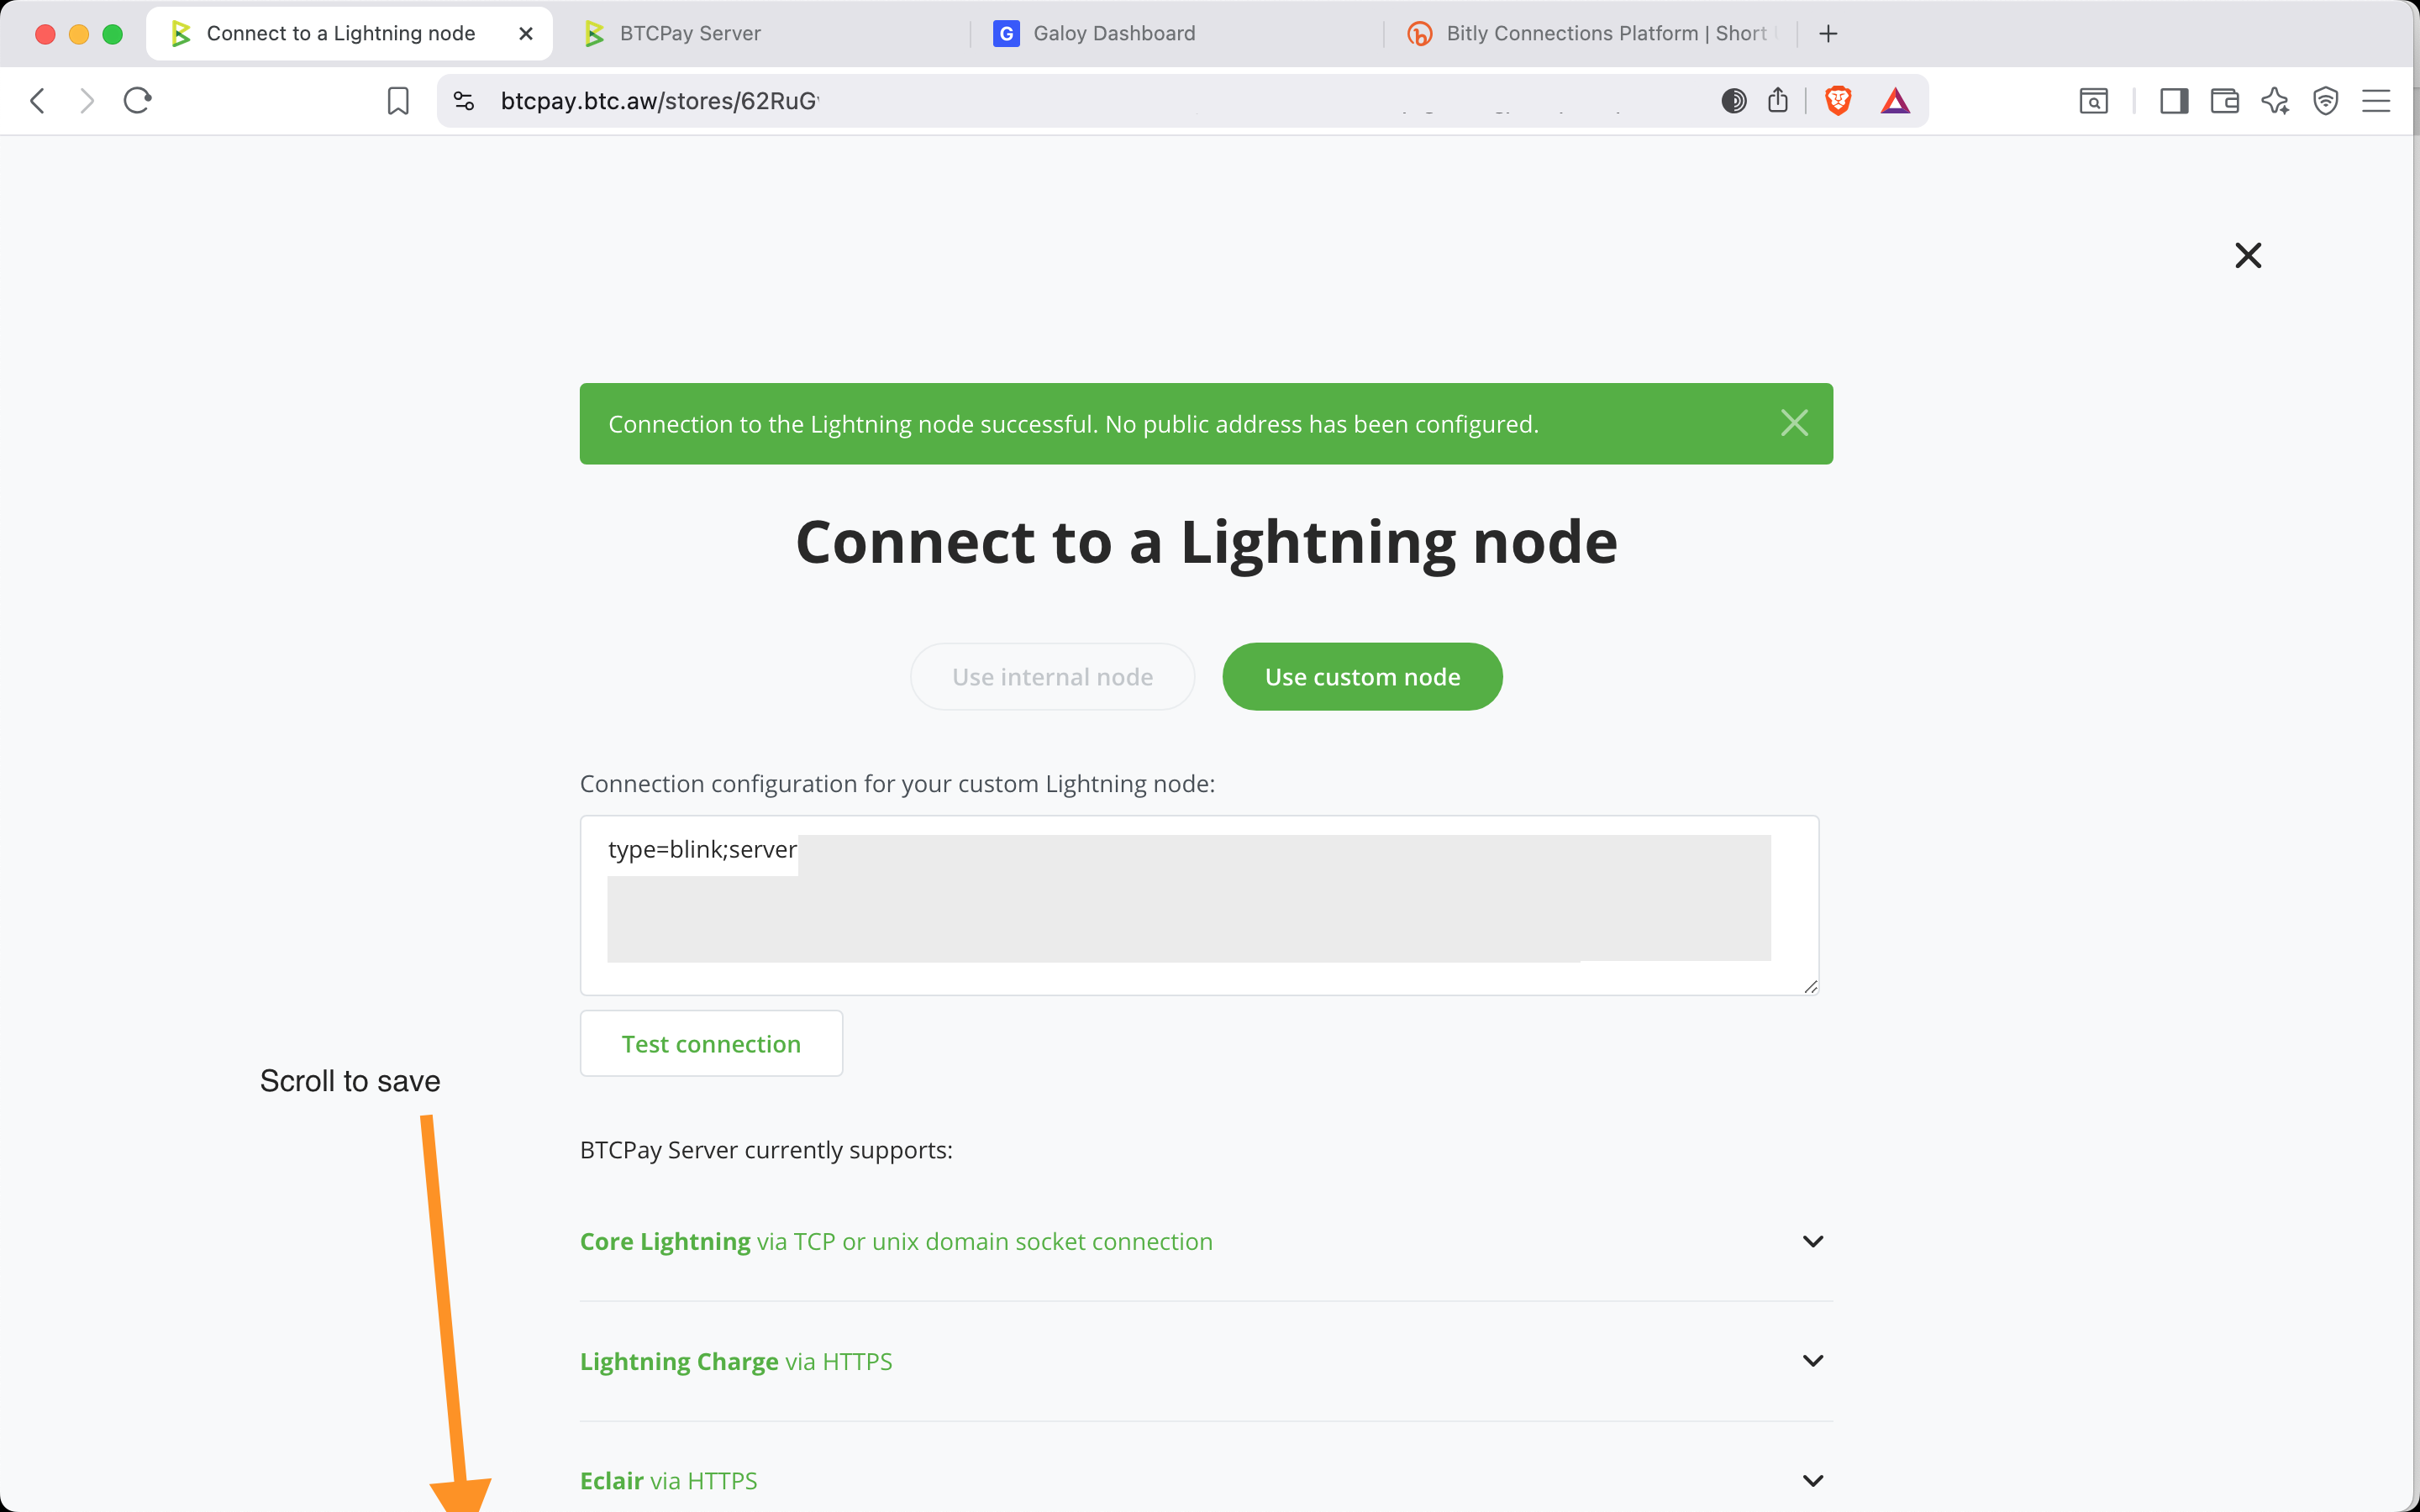
- Click Test Connection
✅ You should see: “Connection to the Lightning node successful.”
- Scroll down to click Save
🏪 Create and Customize Your Point of Sale
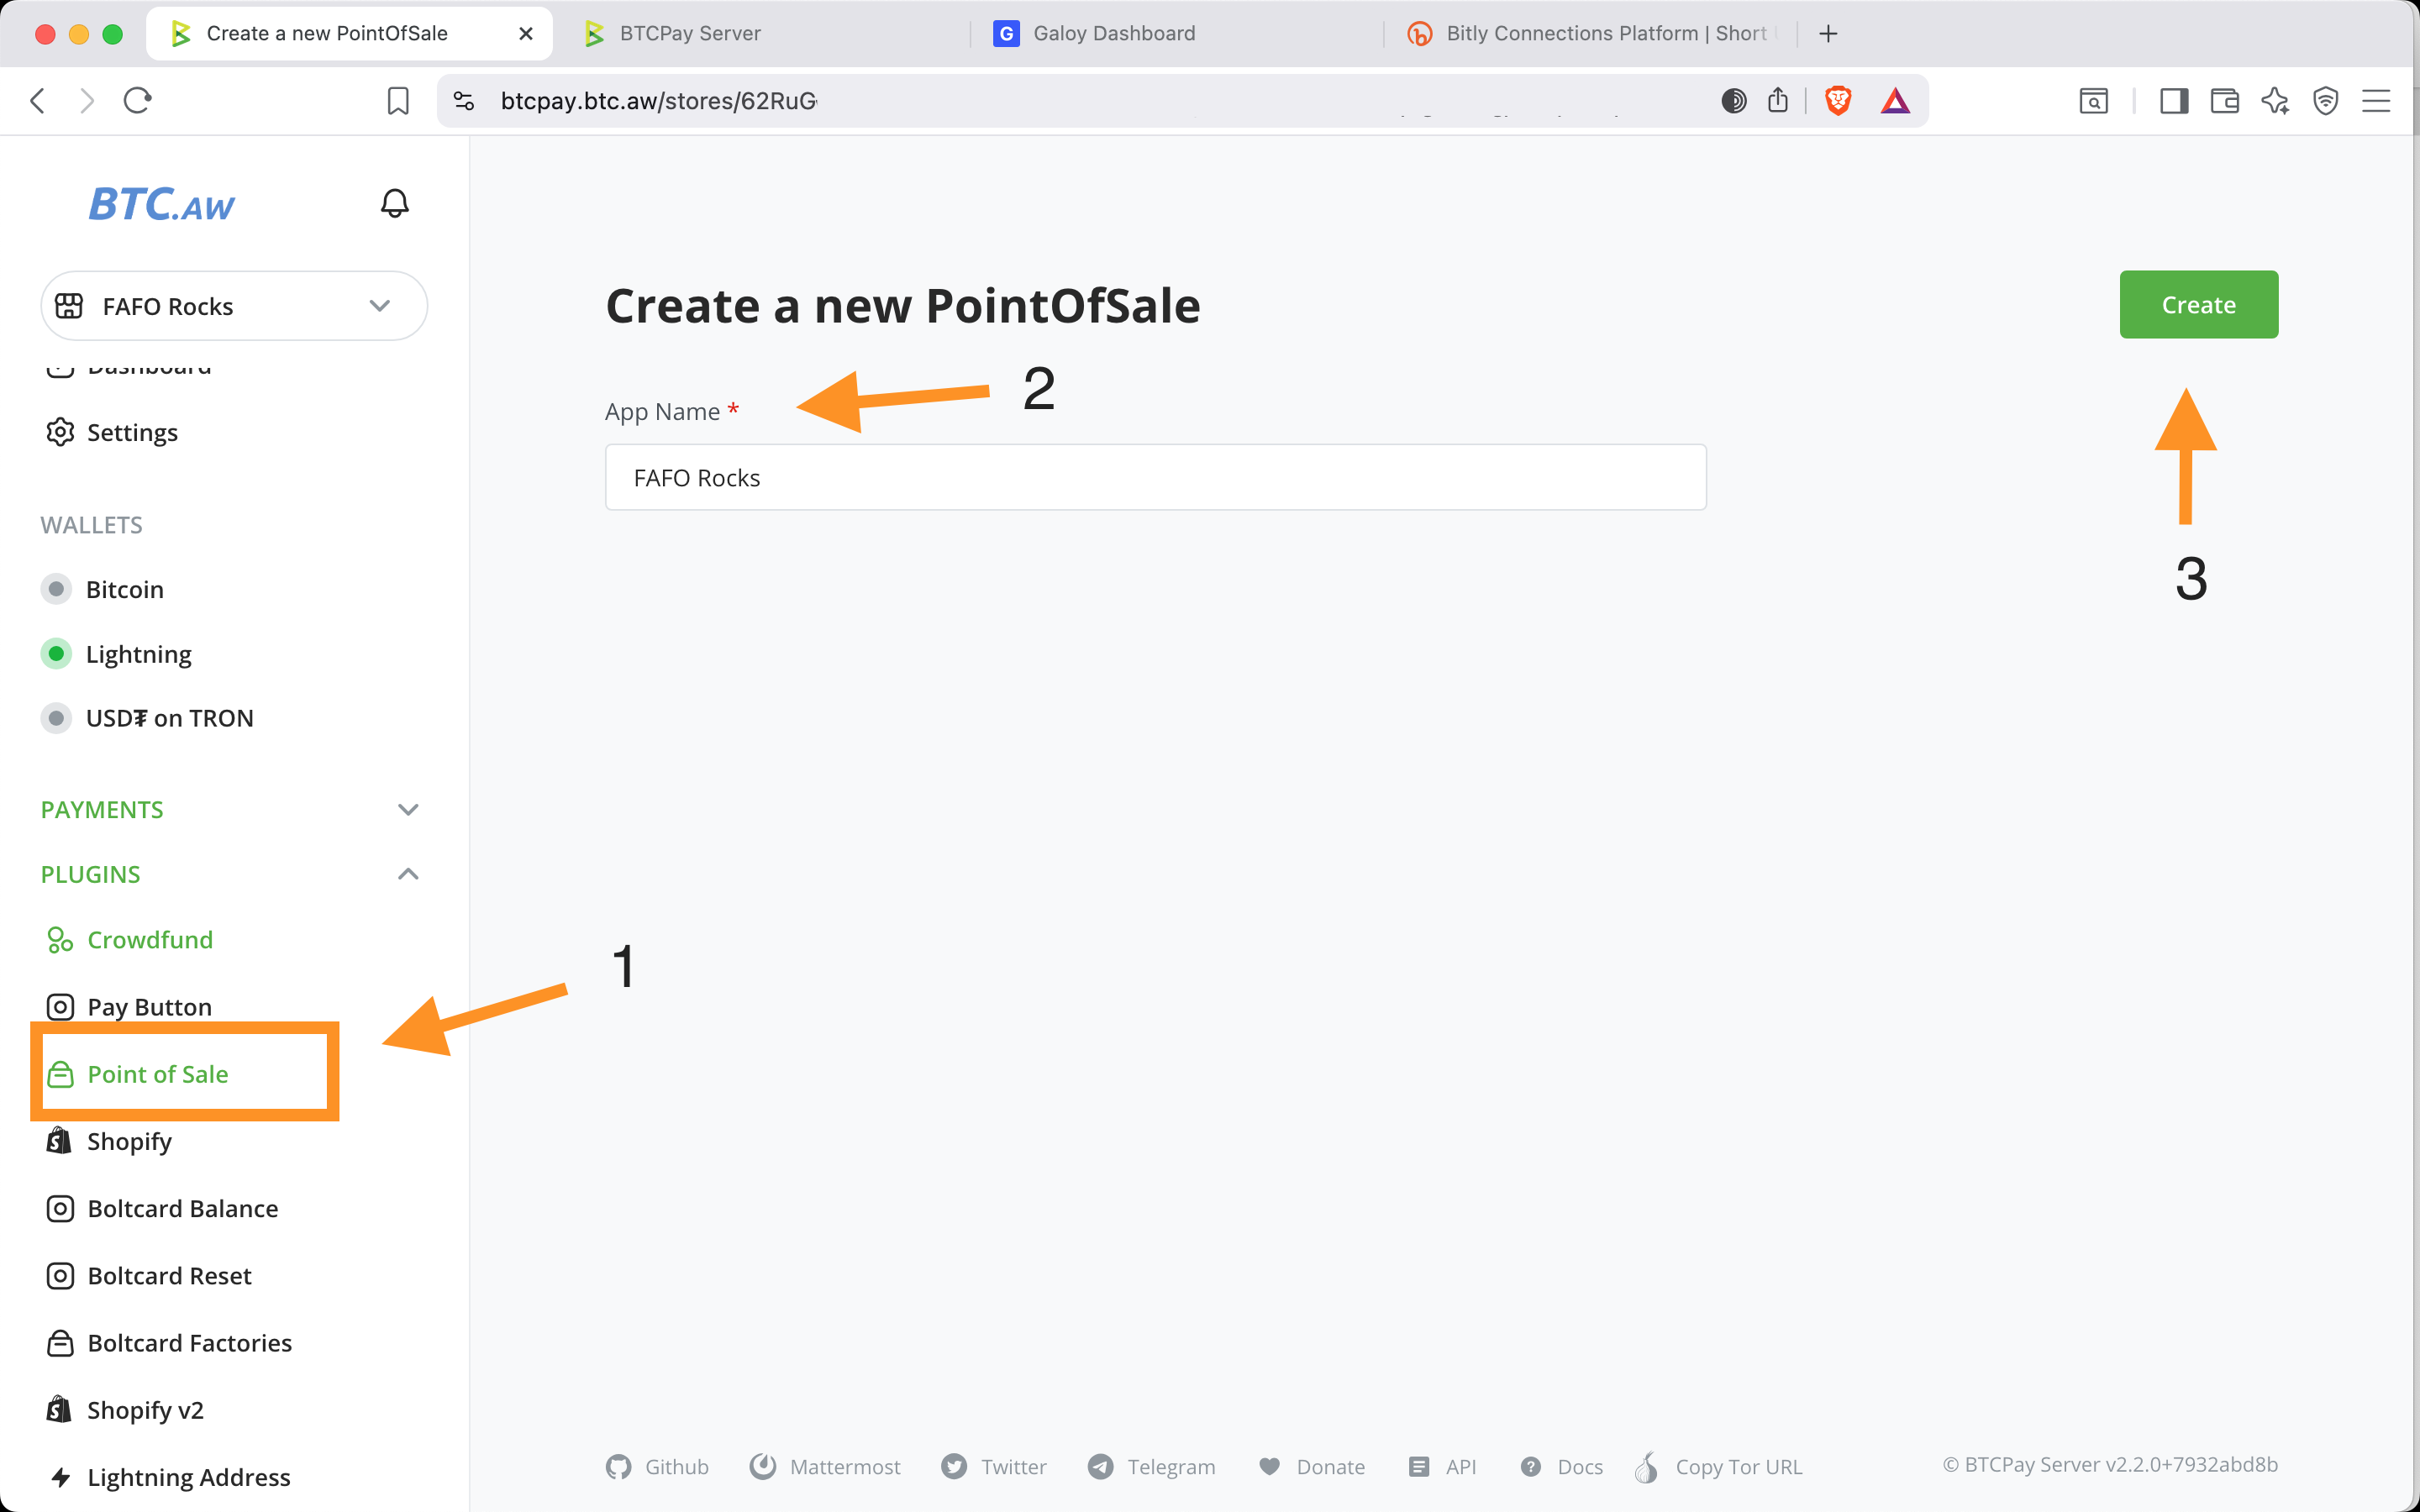
10. Create a Point of Sale
- From the sidebar, select: Point of Sale
- App Name: enter a name for this Point of Sale
- Click Create
Note
ℹ️ Your store can have multiple Points of Sale. Point of Sale refers to the public-facing view that customers see.
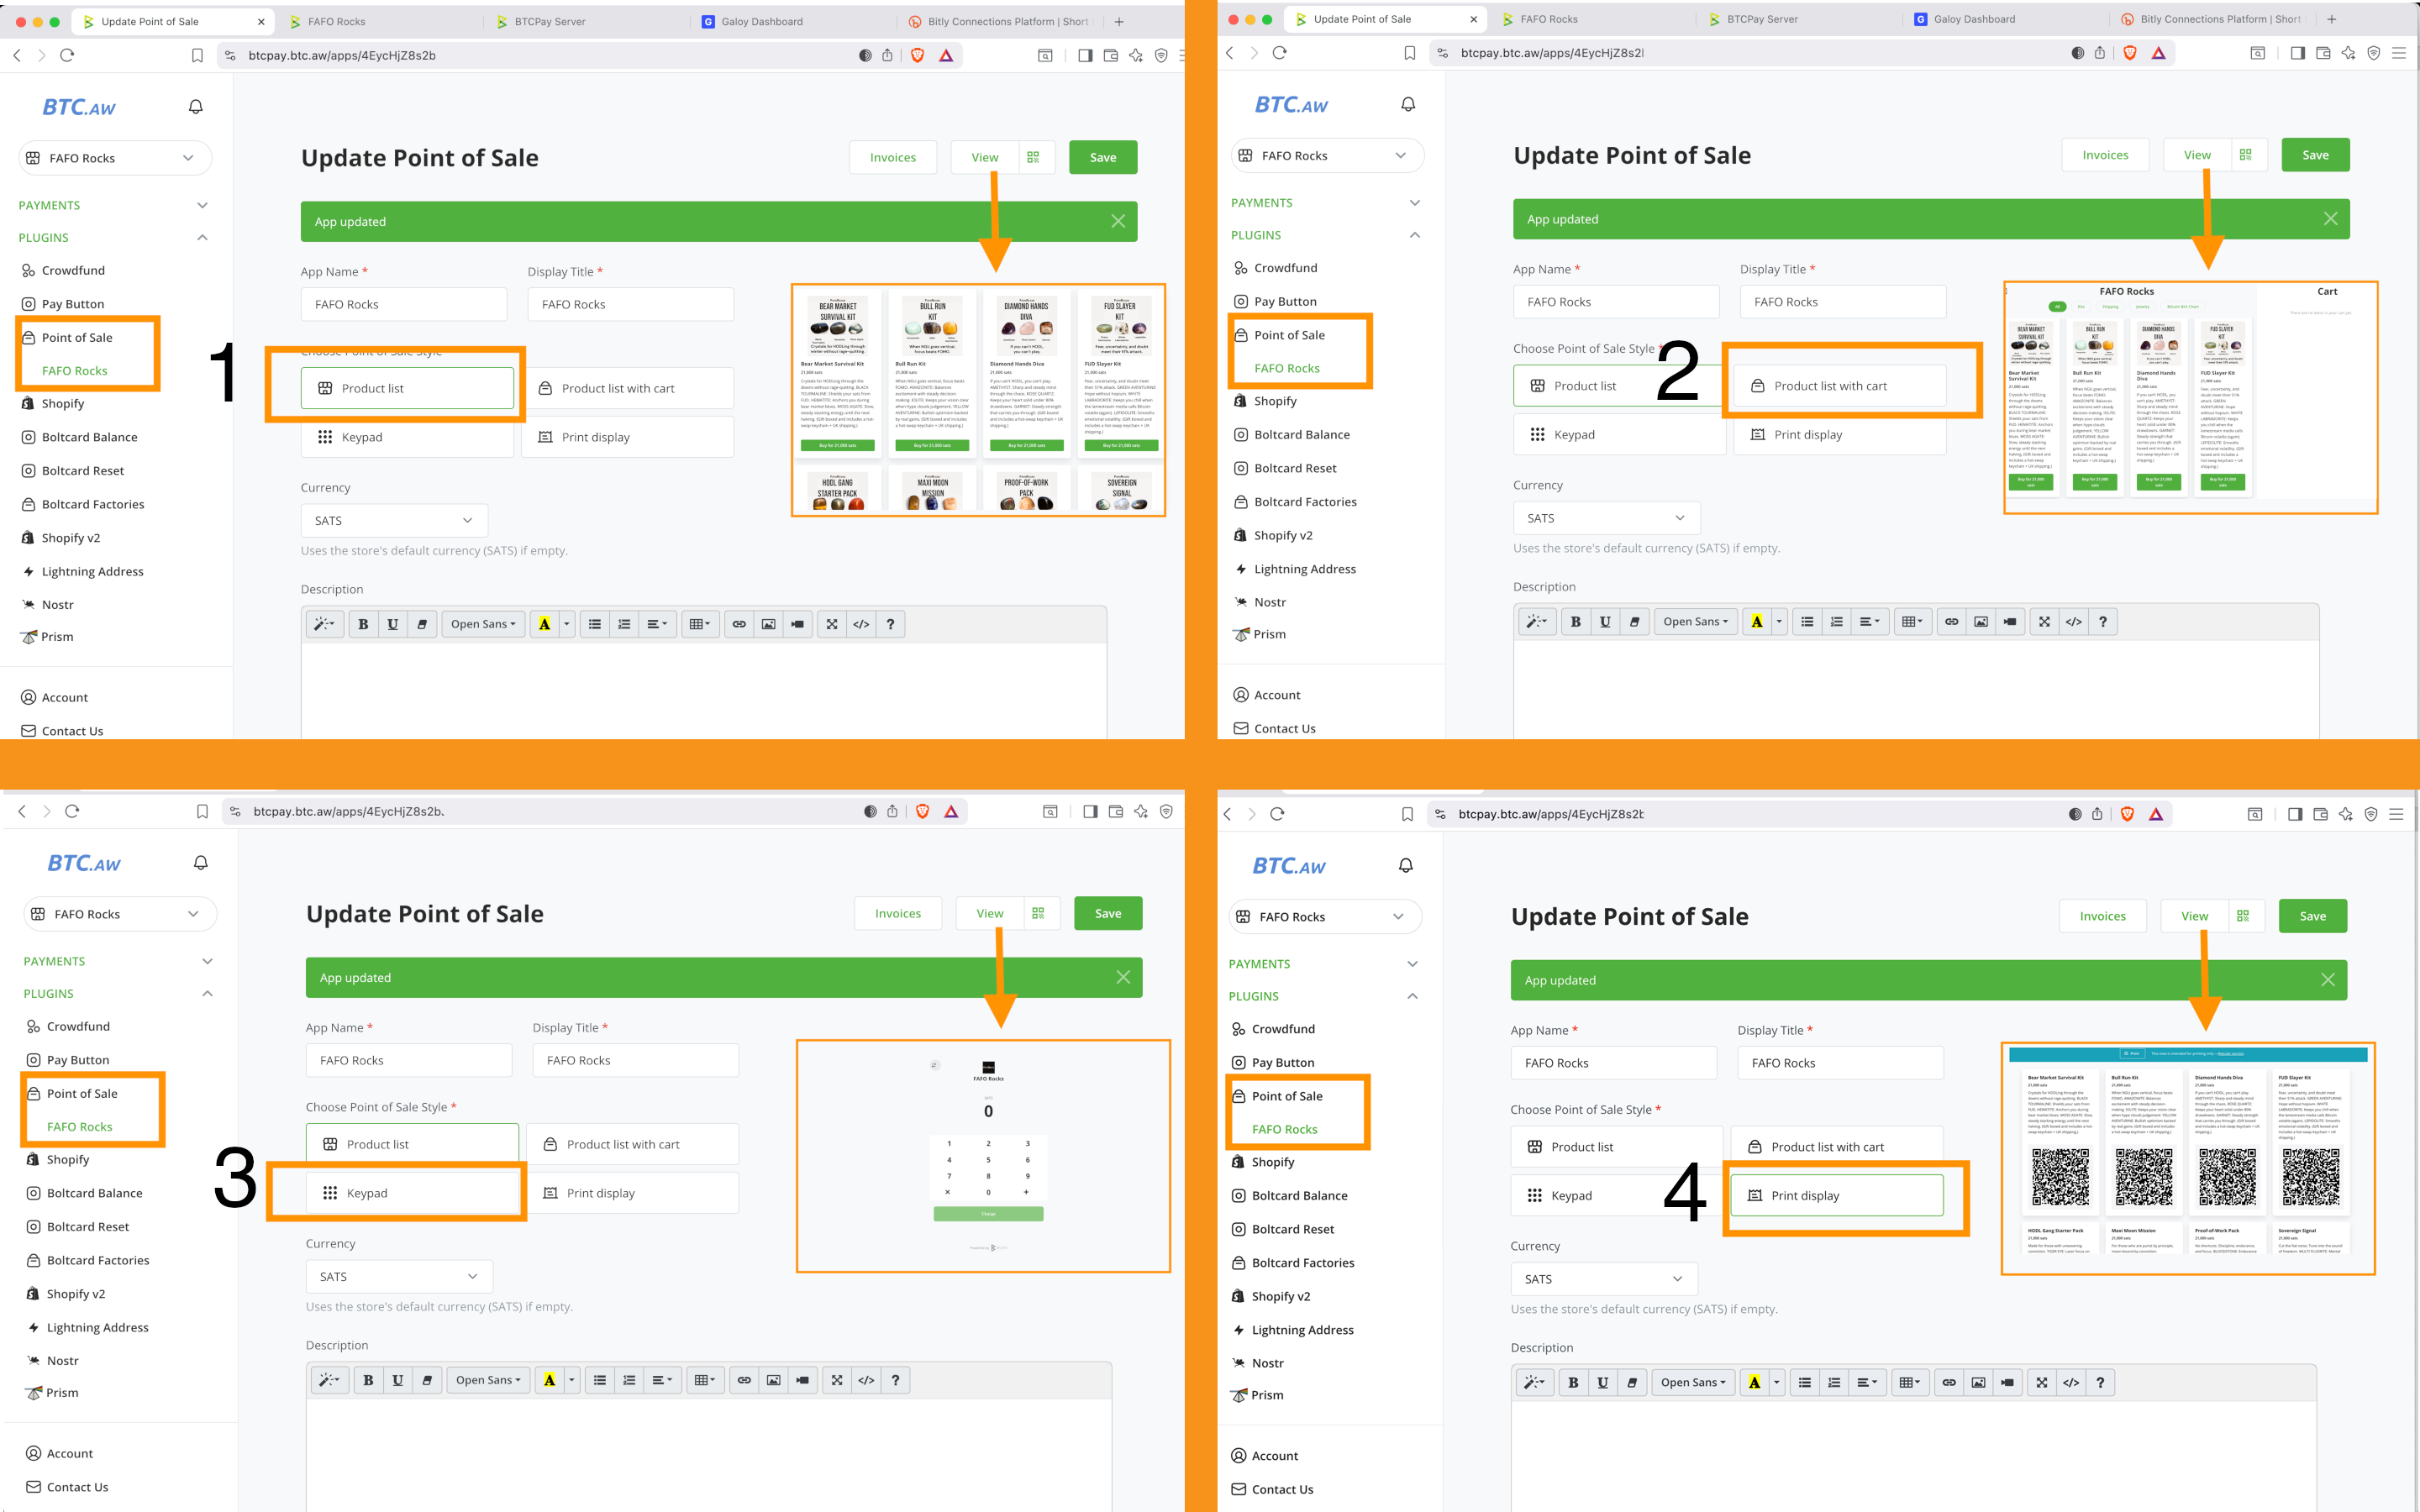
11. Customize Your Store
- Choose layout from:
- Product List: single products / event tickets
- Product List with Cart: multiple products
- Keypad: custom amounts
- QR Code: print
- Click Save
🎉 Congratulations! Your Lightning Store is Now Live! ⚡️
Powered by BTCPay Server, hosted on Bitcoin Aruba with Blink Wallet integration.
Next Steps:
- Run a test purchase
- Adjust a test product price if needed
- Save changes, view your live store, and confirm checkout works
- Add real products with images, descriptions, and prices
- Customize your Point of Sale with your logo, brand colors, and HTML if desired
- Share your store link
- Use a short link or custom domain
- Add your store to the Bitcoin Directory
Heads Up
Bitcoin Aruba and Blink are custodial / permissioned services. Great for onboarding, but the goal is to graduate to self-hosting your BTCPay Server and Lightning node when you’re ready.
✨ Acknowledgements
This guide was created by FAFO Rocks to help more merchants accept bitcoin payments and get set up quickly, smoothly, and at no extra cost. Big thanks to the free, and open-source bitcoin projects and communities that make this possible:
BTCPay Server
- Website: btcpayserver.org
- X: @BtcpayServer
- Nostr: nostr:npub155m2k8ml8sqn8w4dhh689vdv0t2twa8dgvkpnzfggxf4wfughjsq2cdcvg
Bitcoin Aruba
- Website: btc.aw
- X: @BitcoinAruba
- Nostr: nostr:npub1lzyufuwyhz8v06la0uvwgs9pjx3am7jp6czrk65kkskd6x0v9r8q4hcvsc
Blink
- Website: blink.sv
- X: @blinkbtc
- Nostr: nostr:npub13ljnkd633c7maxatymv3y2fqq8vt3qk7j3tt0vytv90eztwgha9qmfcfhw
Without their work, tools like this guide wouldn’t exist. Support them, contribute if you can, and share what you build.
This guide is (hopefully) part of a growing series. It will be updated as more lessons are learned in practice, including on-chain payments and automated email setup.
Connect with us to share feedback, suggest improvements, or follow along as new guides are released:
FAFO Rocks
- Website: tinyurl.com/FAFO-Rocks (created with 🧡 at 丰 London using this guide.)
- X: @FAFORocks21
- Nostr: nostr:npub1mtuzjsdkc6c9ydac0am4dkdefcfszsr3cjx3kly5t4zasq626zhqpvvxl7
⚡️ Made Possible by Free, Open-Source Bitcoin Projects 🔥

Thanks for reading! Keep stacking, keep learning, keep sharing, and keep building.