## Weekly Notes For October 8th – October 15th Last week’s Weekly Notes post went pretty well to be honest. A bit better than I expected actually. Thank you to everyone who took a look and actually read it, or at least pretended to read it. For week two, it’s a bit more than a week because I wanted get my thoughts on my new job at Skylight after the first day or two of working there. So yeah, let’s go ahead and dive in and discuss this past week or so. #CliffNotes #Computers #Gaming #Skylight #Technology #WeeklyNotes #WeeklyNotes #Work image
## Review: Redragon Garen K656 Pro Keyboard As I always try to start each review with here at SoS, I just want to give Redragon a huge THANK YOU for always sending over products for me to review. Today I’ll be reviewing their Redragon Garen K656 Pro Keyboard in MoonDust Gray, as they also have a multi-shade blue colorway you can choose from if you’d like. #Computers #GarenK656Pro #Keyboards #PC #Redragon #Reviews #Technology
## Review: NeoBlade Wireless Ultrasonic Cutter Thanks to the folks over at HOZO Design for sending over their newest product for me to review, the NeoBlade Wireless Ultrasonic Cutter. Previously they had sent me their NeoRuler and their M-Cube Laser Level which are two really great products. #Cutting #HOZODesigns #NeoBlade #Reviews #Technology #Ultrasonic #UltrasonicCutter
## Review: Redragon Behemoth K724 Pro KeyboardAs is often the case, the awesome folks over at Redragon have sent me a stack of items to review. One of those was the review I did last week of the [Redragon Antonium K728 Pro]( ). Today, I’ll be reviewing the second product in that stack, the [Redragon Behemoth K724 Pro]( ) keyboard in the black and green variant. The Redragon Behemoth K724 Pro is a feature-rich mechanical keyboard that aims to deliver a premium custom keyboard experience at an accessible price point. It adopts the popular 75% layout and incorporates several enthusiast-level features.## Product Features<strong>Tri-Mode Connectivity</strong>: It offers versatile connectivity options: USB-C wired, 2.4GHz wireless (via a dongle for low-latency gaming with a 1000Hz polling rate), and Bluetooth 3.0/5.0 for connecting to multiple devices.<br><br><strong>Smart Info-Island Screen</strong>: A standout feature is the 1.41-inch TFT screen. This display serves as an "Info Center," showing real-time information such as the connection mode, battery percentage, time, and operating system. Furthermore, it supports customization, allowing users to upload and display small animated GIFs, offering a unique personalization opportunity.<br><br><strong>Multifunctional Knob</strong>: The metal rotary knob provides easy, dedicated control over media functions (volume up/down, mute/play/pause) and often doubles as a control for adjusting RGB backlight brightness and modes directly on the keyboard.<br><br><strong>RGB Backlighting</strong>: The keyboard features customizable 16.8 million color RGB backlighting with numerous preset and music-sync modes. The LEDs are typically south-facing, which is preferred by custom keyboard enthusiasts as it offers better keycap compatibility and a more appealing lighting display, especially with certain keycap profiles.<br><br><strong>Anti-Ghosting and N-Key Rollover (NKRO)</strong>: It supports full-key NKRO for accurate registration of simultaneous key presses, a critical feature for competitive gaming.## Build Quality And DesignThe Behemoth K724 Pro features a **75% layout** (81 keys plus a knob/screen), which is a compact form factor that retains the essential Function row (F1−F12) and arrow keys, saving significant desk space compared to a full-size board. Obviously what’s missing from this form factor is the 10-key section of the keyboard. The keyboard is built with a modern gasket-mounted structure. This design incorporates sound-dampening materials like multiple layers of foam and silicone (e.g., IXPE switch foam, PET sound pad, bottom socket foam, and a silicone bottom pad) to provide a softer, more cushioned, and acoustically pleasing typing experience, significantly reducing the “hollow” or “pingy” sound often found in budget keyboards. The overall construction feels solid, with a satisfying heft that keeps it firmly in place on the desk. It comes equipped with double-shot PBT keycaps, which are durable, resistant to shine over time, and offer a comfortable, matte texture. The switches are typically Redragon’s custom pre-lubed Mint Mambo linear switches (or similar custom linear switches). These are generally well-regarded for being smooth out of the box with a light actuation force (40g), making them excellent for both fast gaming and comfortable typing. Crucially, the keyboard is hot-swappable (supporting both 3-pin and 5-pin switches), allowing users to easily change switches without soldering for full customization. The design often uses a visually striking colorway with a distinct, angular-molded case that contributes to a “gamer” aesthetic. It includes a prominent multifunctional knob and a unique TFT Smart Info-Island Screen on the top right, adding a modern, high-tech flair to the appearance.## Battery LifeThe keyboard is equipped with a substantial 4000mAh rechargeable built-in battery. Redragon claims the battery can last “about a week” even with full RGB lighting enabled, or around 30 to 50 hours of usage depending on the brightness and complexity of the RGB effects. As is common with wireless RGB keyboards, heavy use of bright RGB lighting and the continuous running of the TFT screen will drain the battery significantly faster. Users prioritizing battery life can extend it greatly by turning off the backlighting and screen. It charges via the included USB Type-C cable, with a full charge taking approximately 3 to 4 hours.## SoftwareThe [Redragon Behemoth K724 Pro]( ) is supported by software, as is the case with most Redragon keyboards. You can find the software here: [Behemoth K724 Pro Software](💾.exe ). The software allows for advanced customization beyond what is available directly on the keyboard. This includes but not limited to the following features. Setting up complex macro sequences and remapping key functions for both work and gaming efficiency. Detailed control over the RGB lighting, allowing users to create custom modes and effects. Essential for uploading custom GIFs to the TFT screen and adjusting its settings. While offering necessary deep customization, the quality and user-friendliness of Redragon’s software have historically been noted by some users as functional but potentially less polished or intuitive compared to major competitors.## Discount CodeAgain, thanks to the awesome folks over at Redragon for allowing me to review this product and others that they have sent over in the past. They have also provided me with a special URL that anyone can use to save a total of 10% off of your entire purchase across their site. So if you’re interested in purchasing the [Redragon Behemoth K724 Pro]( ), or any of their products, you can click this link: [Save 10% On Your Entire Order]( ). I believe if you don’t click the link, you can always manually input ***DECRYPTED*** as the code during check out.## Final ThoughtsThe [Redragon Behemoth K724 Pro]( ) is a compelling option for those seeking a unique, feature-rich, and affordable mechanical keyboard. Its distinctive design, solid build quality, versatile connectivity, and comfortable typing experience make it a great choice for both gamers and typists. While it has some minor drawbacks, its strengths far outweigh its weaknesses. To top it all off, this keyboard is currently priced at only $69.99 which is a really good price point in my opinion. #BehemothK724 #BehemothPro #Computers #Keyboards #PC #Redragon #Reviews #Technology
## My First Adventure Into The Weekly Notes Blog PostsI’ve seen several folks on Mastodon doing these “Weekly Notes” type posts for a while now. The one I see the most often do it is [Joel]( ) and you can find their blog here: [JoelChrono.xyz]( ) that has some great content on it. This first edition of my Weekly Notes won’t be for a specific 7 days really. I’m going to go back to September 25th and go to yesterday, October 6th. From there I’ll get on a regular schedule hopefully but there are just a couple of things I wanted to share that are super exciting to me personally.## September 25th – 27thTo preface a bit, I had been interviewing for a new job at a company called [Skylight]( ) about a week or two prior to these dates. I was in the interview process to join their customer support team, or as they choose to call it, their **Concierge Team**. I had now made it to the final part of the process which was an in-person interview. Skylight decided that mine would be with my direct boss whom I interviewed with on the second round. This would mean I’d get to fly to Minneapolis to meet her in person and do the interview. Well, the meeting, as these aren’t really interviews at this point in the process. I was super excited and quickly found out that I’d be staying at the [Radisson Blu](https://www.radissonhotels.com/en-us/brand/radisson-blu ) at the [Mall of America]( ). The MOA was somewhere I had always wanted to visit and check out, but had never gotten the chance. I was equally as excited to travel and to also meet my boss whom I had a great interview/meeting with a week or so prior. I flew in Thursday morning so I’d have the majority of the day to spend at the mall and just enjoying it as much as possible. My meeting would be on Friday from 10am – 1:30pm, which also included lunch. Again, this was more of a meeting and just a get to know you in person and provide me with an offer more than anything else. The boss and I started with coffee at [Caribou Coffee](https://www.cariboucoffee.com ) and we sat down and conversation happened so naturally and was absolutely enjoyable in every way possible. She showed me the Calendar and a few things that it can do and I got to play around with it as well. Then it was off to lunch, where more great conversations were had, then near the end of lunch she officially offered me the position in which I had applied for. I of course accepted which made me an official employee of Skylight. Let me tell you this, MOA was mind blowing. This place was so huge and then some. Several actual roller coasters inside the mall, big name restaurants and it was three stories. If you ever get a chance to go, I highly recommend it.## September 30th – October 1stJust a few short days later, Skylight wanted me to fly out to Pittsburgh for a day of training if possible, even though my tentative start date wasn’t until October 20th(that’s now October 14th). I agreed since I had a flexible enough job at HST Pathways. This means I’d fly in on Tuesday at some point and would need to leave Wednesday evening after the training was over which was scheduled to end at 3pm. Oddly, this training was really for the 12 part-time people they had just hired, but they asked me if I could go just so I could get some hands-on time with the Calendar and just get a basic understanding of things. It was quite the learning experience and a ton of fun. I got to meet two out of the other three people that I had interviewed with which made it all worth it. I even had dinner with my boss, the supervisor of the 12 member part-time crew who I had interviewed with and one other lady on Tuesday night. Again, super fun to meet the folks I’d soon be working with. Not to mention getting to meet all 12 of the part-time individuals, who were all super friendly and fun to talk to in their own ways. Needless to say, even though I’ve said it above several times, I’m very excited about this new journey especially given the fact that I’ll be working with my former boss of nearly 9 years while I was at Nova Launcher and Branch. While he and I will be working in different areas, we’ll have a lot of interaction and stuff and I know we’re going to make some awesome things happen. The future is truly bright at Skylight.## October 2nd – 6thThe rest of the time wasn’t near as exciting as all of that. I have been at home since getting back late on October 1st and there’s no more traveling until likely January, which will be a all-hands type meet up for Skylight. Definitely something I’m excited about.## Gaming, Gaming, GamingWhat I have done during this time was play some video games since I’m off from work until October 14th. So what have I been playing you ask? Mainly it’s been Borderlands 4. I’ve been playing since the day it was released back on September 12th and I finally finished the main campaign over the past few days. However, this is where the game really begins as there’s so much to do at this point. I’ve also been play [Hollow Knight: Silksong]( ) here and there as well as [Megabonk]( ). Both are super fun and I can’t wait to get back to Silksong and really dive in and hopefully complete that game as well. For now, that’s about I’m playing, as those are taking up pretty much all of my spare time. ## BloggingAs is often the case, I haven’t done much writing on the site over the past few weeks, but I have written a review for the [Redragon Antonium K728 Pro Keyboard]( ), though that was back on September 18th, so shouldn’t really be mentioned in this post since it doesn’t start until September 25th. I did write another blog post, and this one was just done yesterday called [How To Quickly Lock And Secure Your Mac](https://www.seerofsouls.com/quick-and-effective-ways-to-lock-and-secure-your-mac/ ). I of course would appreciate it if you’d check out either of them, or even any of the other posts on the site and leave some comments on things of interest to you.## Final ThoughtsAgain, this is my first attempt at this **Weekly Posts** stuff, so I hope you find it interesting. I don’t normally do to much other than work and sleep, with the occasional video game thrown in there, but I’m going to try and stick with it as best I can. Just need to find the right schedule for it that works for me. Feel free to leave a comment below with any suggestions on accomplishing that or what you’d like to know if I do or don’t do during the week. I’m certainly up for anything to make this post as interesting and informative to each of you as I possibly can. #Blogging #Computers #PC #Technology #WeekNotes #WeeklyNotes image
## Quick And Effective Ways To Lock And Secure Your MacLocking and securing your Mac, or any computer for that matter, is a great and effective way to protect your personal files, any sensitive information you might keep on the Mac and to prevent unauthorized access. This is especially important if you have multiple users that use the Mac or if you are often using it in public places. Whether you’re stepping away from your desk for a few minutes or securing your Mac remotely, knowing how to lock your Mac properly ensures your privacy and keeps your data safe. With that being said, I’m going to share various methods to lock your Mac manually, automatically and even remotely. I’ll show you to use keyboard shortcuts to system preferences to keep your Mac safe.## Using Keyboard ShortcutsKeyboard shortcuts are the fastest way to lock your Mac without navigating through menus. **Lock Screen Shortcut**<li><strong>Control + Command + Q</strong>This shortcut instantly locks your screen, taking you to the login window. Your apps and files remain open in the background, but your Mac requires a password or authentication to access them again.</li> **Put Mac to Sleep Shortcut**<li><strong>Command + Option + Power</strong>&nbsp;(for Macs with a dedicated Power button)</li><li><strong>Command + Option + Eject</strong>&nbsp;(for older Macs with an Eject key)</li> Putting your Mac to sleep effectively locks it while also conserving power. Depending on how you have the system configured, you might need to enter your password when waking up the system (we’ll cover this in section 2).## Using The Apple MenuYou’ll find this in the upper left hand corner of the screen. This only takes two clicks and is super easy and simple to use to secure your Mac.<li>Click the <strong>Apple logo</strong></li><li>From this menu click on <strong>Lock Screen</strong></li> This is no different from the keyboard shortcut method mentioned above. It will require you to enter your password to unlock the system assuming you have it setup that way.## Automatically Lock Your MacIt’s easy for any and all of us to forget to lock our Mac’s at times. It’s just how we are as humans. That’s why I prefer the method of automatically locking my Mac, so that if/when I do forget, it’ll do it for me. **Enable Screen Saver With Password** Using the screen saver can double as a security feature which is very handy and often displays something nice on your screen after a short period of time of inactivity. Again, if setup correctly, this will require you to enter your password to get back into the system, making it yet another secure way of locking your Mac. This only takes a few simple steps to setup, and again, it’s my preferred way of securing my Mac, mainly because I’m the only user on my Mac and I often have to move away from it quickly while working on another system. To enable the screen saver locking method, we’re going to follow the steps below. Open **System Settings** Click on **Lock Screen** in the left panel Set your preferred time interval of inactivity in which you want the screen saver to start Enable the Require Password Immediately after screen saver or sleep begins option## Setup Automatic Lock After Screen Goes To Sleep Or The Screen Saver Begins<li>Go to <strong>System Settings</strong></li><li>Click on <strong>Lock Screen</strong> in the left panel</li><li>Click the <strong>Require Password After Sleep Or Screen Saver Begins</strong> option and set it to Immediately</li>This method guarantees that if your Mac goes to sleep automatically or you close the lid(if you’re using a MacBook), the device will lock automatically and will require you to enter your password or Touch ID to wake up the system.## Using Hot Corners To Lock Your MacThe Hot Corners feature in MacOS is super handy and allows you to do a lot of things by simply dragging your mouse to various corners of the screen. This means you can do this to activate your screen saver which of course will lock your Mac if setup properly. Open **System Settings** Click on **Desktop & Dock** in the left panel Click on **Hot Corners** Choose a corner that you prefer and select **Start Screen Saver** Click **Done** to save## Lock Your Mac Using Find My MacThis is a method I’ve never used and hopefully will never have to use. This is more for if/when your Mac is lost, stolen or simply left behind in a place you can’t get back to very quickly. This of course does require the **Find My Mac** to be enabled on the Mac. **Find My Mac** is part of Apple’s broader **Find My** network – a security and tracking feature built into macOS, iOS, and iPadOS. It allows you to locate, lock, or erase your Apple devices remotely using iCloud. The feature uses a combination of Wi-Fi signals, Bluetooth beacons, and Apple’s vast network of devices to track lost or misplaced products, even when they are offline (if you’ve enabled the **Find My network**). When you lock your Mac remotely with **Find My Mac**:<li>The Mac becomes inaccessible to unauthorized users</li><li>Your personalized lock screen message is displayed</li><li>You can track its location through iCloud</li><li>You have peace of mind knowing your data is protected</li> To enable the **Find My Mac** option, you’ll need to follow the steps below. <li><strong>System Settings</strong></li><li><strong>Apple ID</strong></li><li><strong>iCloud</strong></li><li><strong>See All</strong></li><li>Enable <strong>Find My Mac</strong></li><li>Allow <strong>Find My Network</strong> for offline tracking(not mandatory, but highly recommended)</li> Another way to lock your Mac remotely using the **Find My** option is to visit the **iCloud** website and do it from there.<li>Visit <a href="https://iCloud.com">iCloud.com</a> </li><li>Login with your Apple ID</li><li>Choose the Mac from the list you wish to lock</li><li>Click the Lock option</li><li>Follow the prompts to set a passcode and optional message</li> Doing this will lock your Mac remotely and will force anyone who is in possession of the device to be required to enter the password to access it. One thing to note here is, even if the Mac is offline, the lock command will activate as soon as the device connects itself to the internet. ## Does Closing The Lid Lock Your MacBook?This all depends on your settings and what you’ve chosen, or not chosen. You can ensure the Mac automatically locks when closing the lid by follow the steps below.<li>Open <strong>System Settings</strong></li><li>Click <strong>Lock Screen</strong> in the left panel</li><li>Enable the <strong>Require Password After Sleep Or Screen Saver Begins</strong> is set to <strong>Immediately</strong></li> As was the case above, if you enable this method, the MacBook will lock automatically and will required the password to be used to unlock it. One important thing to note here is if you are using your MacBook with an external display and in **Clamshell Mode**, closing the lid may not lock the system automatically. It’s encouraged that you get into the habit of locking the screen via other manual methods to ensure protection of your MacBook.## Final ThoughtsLocking and securing your Mac and/or MacBook is something everyone should get into the habit of as it will protect your personal data and other things. There are multiple options as I listed above, and there are likely many other ways you can lock the Mac quickly and easily enough. I also recommend you setup both manual and automatic locking methods along with using strong passwords and file encryption to ensure your Mac is secure as possible. If you have other methods not listed here, please feel free to drop a comment below and give me the steps of what you do. I’m always interested to learn new methods since I am still relatively new to the Mac world myself.
## Review: Redragon Antonium K728 Pro KeyboardThe [Redragon Antonium K728 Pro]( ) is a mechanical keyboard that aims to deliver premium features at a budget-friendly price point of just $59.99. The pink and black colorway offers a stylish aesthetic that stands out from typical gaming keyboards. While it isn’t perfect, it’s a solid option for users who want a capable and customizable mechanical keyboard without breaking the bank.## Build Quality and DesignThe keyboard’s aesthetic is one of its major selling points, with gradient black and pink PBT keycaps that look great even without the backlighting. The design is available in different form factors, including the TKL (Tenkeyless) 80% layout, which is popular with FPS gamers who need more mouse space. The full-size 100% version ([Antonium K745 Pro]( )) is also available, which I’ll be reviewing in the very near future! In terms of build quality, the [Antonium K728 Pro]( ) feels “decent but not premium.” The case is made of polycarbonate and while it feels better than many other plastic keyboards in its price range, it can feel a bit light and exhibits some flex when pressed down hard enough. When I say “not premium”, I don’t mean this in a bad way. There are just much heavier duty keyboards that feel more premium if you will. I’ve owned numerous Redragon keyboards over the years as you can imagine and I’ve never had any of them fall apart, break, chip or anything similar. A key feature is the gasket-mounted design, which is a significant plus for a keyboard in this price bracket. This design provides a softer, more cushioned feel to keystrokes and, combined with the five layers of sound-dampening foam (including a silicone bottom pad, socket foam, and sound pad), it produces a pleasant, “creamy” and “thocky” sound profile right out of the box. The keyboard also features a two-step kickstand design on the bottom to adjust the typing angle for ergonomic comfort.## Product FeaturesThe Antonium K728 Pro is packed with features typically found in more expensive keyboards.<li><strong>Connectivity:</strong> It offers a “tri-mode” connection, providing flexibility with USB-C wired, 2.4GHz wireless with a dongle, and Bluetooth 3.0/5.0. A storage slot for the 2.4GHz receiver is conveniently located on the back.</li><li><strong>Switches and Keycaps:</strong> The keyboard comes with Redragon’s custom “Leopard L” or “Mint Mambo” linear switches, which are praised for being smooth and quiet. The PCB is hot-swappable, which is a huge benefit for both beginners and enthusiasts. This allows you to easily change out switches (both 3-pin and 5-pin) without any soldering, giving you the freedom to customize the feel and sound of your keyboard. The included PBT keycaps are durable and have a slightly textured finish to prevent slipperiness.</li><li><strong>Lighting and Sound:</strong> The Antonium Pro features south-facing RGB LEDs, which are ideal for showcasing custom keycaps and prevent interference with Cherry-profile keycaps. There are 20 preset lighting modes, and the lighting can be further customized with the accompanying software. The five-layer dampening system is a standout feature, effectively reducing hollow noises and creating a clean, satisfying sound.</li>## Battery LifeThe keyboard is equipped with a 4000mAh internal battery. Battery life can vary significantly depending on usage and, most importantly, RGB lighting. With the RGB lighting fully on, you can expect the battery to last around a week with daily use. However, if you lower the brightness or turn the lighting off completely, the battery life can be extended to several weeks. One notable drawback is that there doesn’t appear to be a simple way to check the battery percentage directly on the keyboard, though it can be checked through a paired device on Bluetooth.## SoftwareThe Redragon Antonium K728 Pro is supported by a dedicated software application. This software allows users to expand their customization options beyond the on-board controls. You can create your own lighting modes and effects, assign macros to keys, and remap different key bindings or shortcuts. The software isn’t anything special in terms of its interface, it’s functional and provides the necessary tools for advanced customization, which is a significant plus for a keyboard at this price point. You can find the software for the Antonium K728 Pro via this link: [Antonium K728 Pro Software](💾.exe ).## Discount CodeAgain, thanks to the awesome folks over at Redragon for allowing me to review this product and others that they have sent over in the past. They have also provided me with a special URL that anyone can use to save a total of 10% off of your entire purchase across their site. So if you’re interested in purchasing the [Redragon Antonium K728 Pro]( ), or any of their products, you can click this link: [Save 10% On Your Entire Order]( ). I believe if you don’t click the link, you can always manually input ***DECRYPTED*** as the code during check out.## Final ThoughtsThe [Redragon Antonium K728 Pro]( ) is a compelling option for those seeking a unique, feature-rich, and affordable mechanical keyboard. Its distinctive design, solid build quality, versatile connectivity, and comfortable typing experience make it a great choice for both gamers and typists. While it has some minor drawbacks, its strengths far outweigh its weaknesses. To top it all off, this keyboard is currently priced at only $59.99 which is a really good price point in my opinion. #AntoniumPro #Computers #Keyboards #PC #Redragon #Reviews #Technology
## Review: HOZO Design NeoRulerMeasurements are an area that haven’t really undergone that many real innovations over the years. The humble ruler, even less so. HOZO Design aims to change that with its [NeoRuler](https://www.amazon.com/NeoRuler-NeoCaliper-Measuring-Customized-Measurment/dp/B0CJHSX9GQ?tag=trxai01013-20 ), which is a measuring tool that can help both at the desk and away from it. The NeoRuler is basically a considerable expansion of the concept of the ruler. To start with, you don’t have the usual ruler functionality of markings for centimeters and inches on the edges. And, as equipped, it looks more like a set of calipers. This takes the more advanced route of requiring a small display to actually tell you how long something is. Instead of measuring simply by putting the ruler against an object and using your eyes, you instead have to move a physical indicator along the length of the ruler, along a channel. Doing so will display the measurement on the LCD display, in millimeters and inches.<strong>Hardware Specs</strong><br>1.14″ backlit true-color LCD display 240×135 at 240DPI<br>0.004″ (0.1mm) resolution<br>12″ (305mm) measuring range<br>0.4lb (184g) weight<br>1000 mAh lithium-polymer battery<br>180-day battery life in standby, 12 hours of continuous use under maximum power consumption <br>Aluminum Alloy, Stainless Steel, ABS, PC, and POM<br>Bluetooth 4.0## Product DesignThe NeoRuler utilizes a segmented LED strip along the edge of the ruler and a 1.14″ backlit true-color LCD display to display measurements. There are no labeled increments along the ruler, but instead, a sliding pointer is manually moved and the distance is displayed on the screen. The screen is absolutely fabulous. It’s probably the easiest-to-read screen you’ll ever see. There is a non-glare coating over the screen that makes it easy to read even with bright overhead lights. There are three buttons on the end that you use for various functions. Near the display, there is a Type-C port for charging the 1000 mAh battery. The Premium Combo includes the NeoRuler, NeoCaliper, NeoPointer, and NeoMaginfier. The pointers are simple, one for regular measuring and drawing, and two that are used for guiding pencil, pen, or marker tips. The digital nature of the HOZO Design NeoRuler was one of the things that intrigued me. The NeoRuler can display measurements in multiple units such as mm, cm, m, inch (decimal and fractional), feet, yard, and mike/km when in map mode with a scale greater than 1:50000. One of the things I found interesting is that you can “zero” the ruler at any point along its length, and the ruler will display measurements when you move the pointer in either direction. This is handy when you want to leave the ruler along a line and measure from one place to another without lifting the ruler. One of the main features of the NeoRuler is its Smart Scale feature. There are 93 built-in scales distributed in 8 scale modes. For example, in the architectural mode, there is a scale for 1″ = 1′. If you’re drawing something that isn’t actual size, these modes can be quite a lifesaver and will save you from having to do a lot of math.## Display Screen And Battery LifeUnlike a typical caliper, the NeoRuler has a color LCD screen with a resolution of 240×134 and 240 PPI. The screen has a diagonal size of 1.14″, which might seem a bit small on paper but on-hand is a useful size with a UI that makes a smart use of the size/resolution of the display to provide all the necessary information without becoming neither overwhelming nor lacking details. Through the mobile app you can customize the color theme of the display to better adjust to your preferences. Inside is a 1,000mAh battery with USB-C charging, but you’re probably not going to need to recharge it that often. You can get up to 14 days of continuous usage under “comprehensive power consumption,” or 12 hours of continuous use under its maximum consumption setting. It also boasts 180 days of battery life when left in stand-by mode.## Portable And DurableRulers from the traditional age remain portable yet their delicate construction remains their biggest weakness. Plastic can crack. Wood can warp. paper-based markings gradually disappear due to the elements passing by. NeoRuler is compact and durable. NeoRuler’s strong housing safeguards interior technology. The built-in rechargeable power system maintains its readiness through an entire working day. The tool serves all professionals who regularly work in both office environments and classroom and field-based settings.## Final Thoughts[For $249 the HOZO Design NeoRuler]( ) certainly isn’t for everyone. It’s more for those that measure things day in and day out, or at least on a pretty regular basis. For someone like me who doesn’t work in a field that requires measuring, it’s out of my price range for sure. For those that do work in certain fields, I feel this would be a great bargain with all that it does. #HOZODesign #NeoRuler #Reviews #Technology #Tools
## Answering Some Randomly Generated QuestionsI know I have posted anything in a while, so today I’m going to change that. Thanks to the [Blog Questions Bot]( ) that [Jcrabapple]( ) has on Mastodon, I’ve decided to take the list of questions it posted yesterday and jot down my answers. So let’s go ahead and dive in and get started.## What Color Always Makes You Feel Happy, And Why?Super easy to answer, **PURPLE**! [The color purple](https://www.imdb.com/title/tt0088939 ) hasn’t always been my favorite color. When I was a little kid and even very early adult, my favorite color was blue, and mostly dark blue over light blue. However, that started to change in my early adult days. My dad’s favorite color was always purple and he had a lot of it around the house, on clothes and most anywhere. It started growing on me over time and eventually I accepted that my favorite color had changed from blue to purple. Purple just feels relaxing. A lot of people say that purple symbolizes the beauty of life and in a lot of ways I would agree with that statement. To me, purple is beautiful, regardless if it’s a dark purple or a light purple. While I prefer dark purple in a lot of cases, there are definitely times that I prefer a lighter shade of purple. ## If You Could Speak Any Language Fluently, What Would It Be?I’m not going to lie, this is tough. Mainly because there are so many different languages used around the world. In fact, there are numerous languages that I don’t know about or know very little about. With that said, since I have to pick one, I guess I’m going to go with French. I know a few French words, but only a few, as in less than 10 most likely. But to hear, to hear people speak French, it just sounds smooth and relaxing in a lot of ways. Kind of hard to explain, but I think it would be the language I’d want to learn first. Not for any particular reason such as having French speaking friends, because I don’t, or needing to know it for work related stuff, because again, I don’t need to know it for that either.## Describe The Best Sandwich You’ve Ever HadWhat’s with all these tough questions this time around? I don’t even know where to begin with this one. Therefore, I’m going to go out there a bit with my answer and mention something that a lot of people likely don’t know too much about. The sandwich I’ve chosen for this is the Monte Cristo from an old restaurant called Bennigan’s. [Bennigan’s]( ) was hugely popular when I was a kid an early adult living in Houston, Texas. They had a little bit of everything, but the only thing I’d ever order when I went to Bennigan’s, which was actually quite often, was the [Monte Cristo]( ). Bennigan’s describes it like this: Honey wheat bread layered with tender ham, roasted turkey, Swiss and American cheeses. Batter-dipped, gently fried and coated with powdered sugar. Served with red raspberry preserves for dipping. I know other restaurants who serve something similar, but I’ve never found any place that comes even remotely close to being as good as Bennigan’s made it. It’s something I wish I could replicate at home, but I’ve never been successful.## What’s One Tiny Ritual That Makes Your Day Better?Yet again, another tough question. Tough for me since I don’t really have any “daily ritual” so to speak. I guess most people would say the usual stuff such as, starting the day with coffee/tea, taking a hot shower right after getting up. Once again, I’m going to do something totally different with my answer and I’m going to say, hugging and kissing my wife! I start each and every day by giving her a hug and giving her a kiss. We’ve done that for the entire 12 years we’ve been together and I hope the “ritual” continues for many more years to come. ## Final Thoughts…These were some really good questions, which is why I decided to answer them. Two or three of them really made me stop and think for a minute before I could give a good answer. If you’re a blogger, like to write somewhere at random times, I’d like to see you take these questions and answer them too. Feel free to tag me on Mastodon – [Cliff On Mastodon]( ) or link back to this post or just mention me in the article. Or don’t do any of those and just provide the answers for others to read. I’m ok regardless of how you do it! #BlogQuestions #Computers #RandomQuestions #Technology
## Review: HOZO Design M-Cube 02 Anti-Gravity Laser LevelLet me start off by giving a huge thank you to the folks over at [HOZO Design]( ) for sending this product over to me. When I saw the press release I immediately knew I wanted to give this a try. Mainly because I have quite a few things hanging in my house that weren’t the easiest to hang due to being in multiple parts, and I wanted to go back and make sure they were actually level, and not just level to the eye.## 
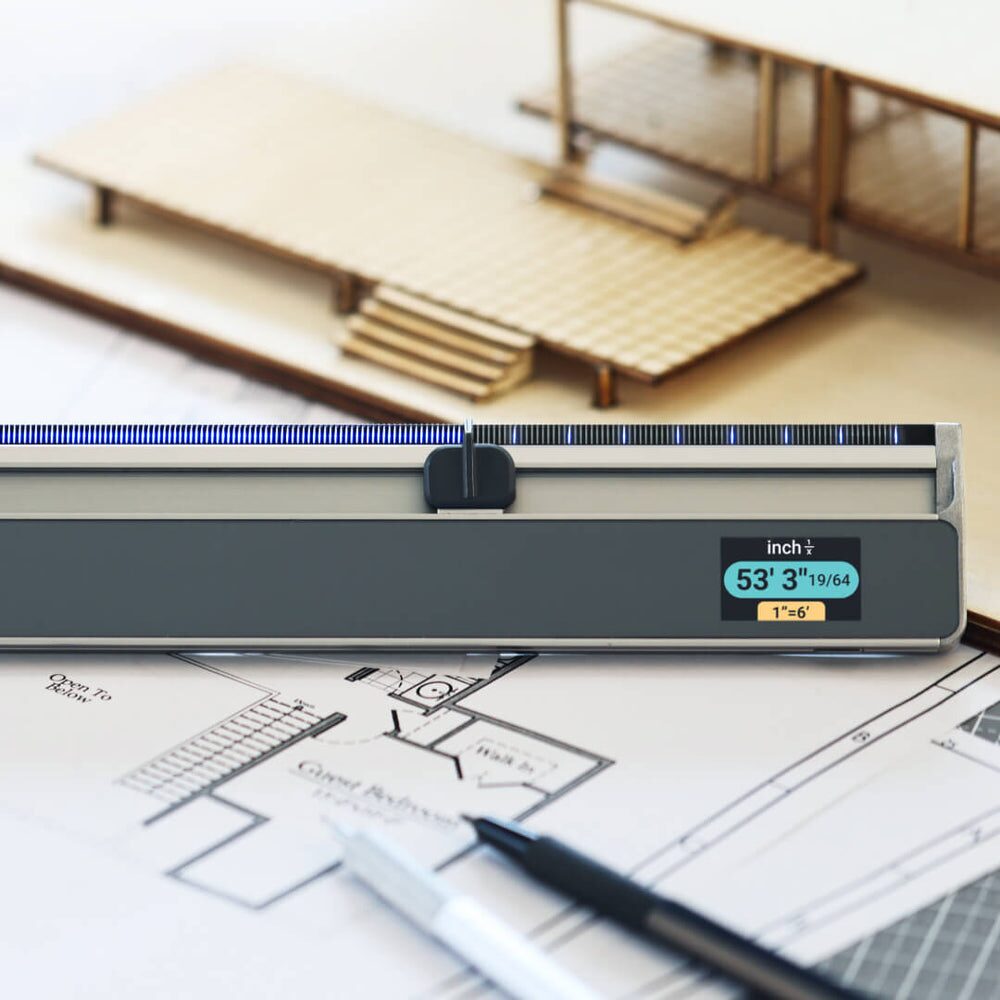
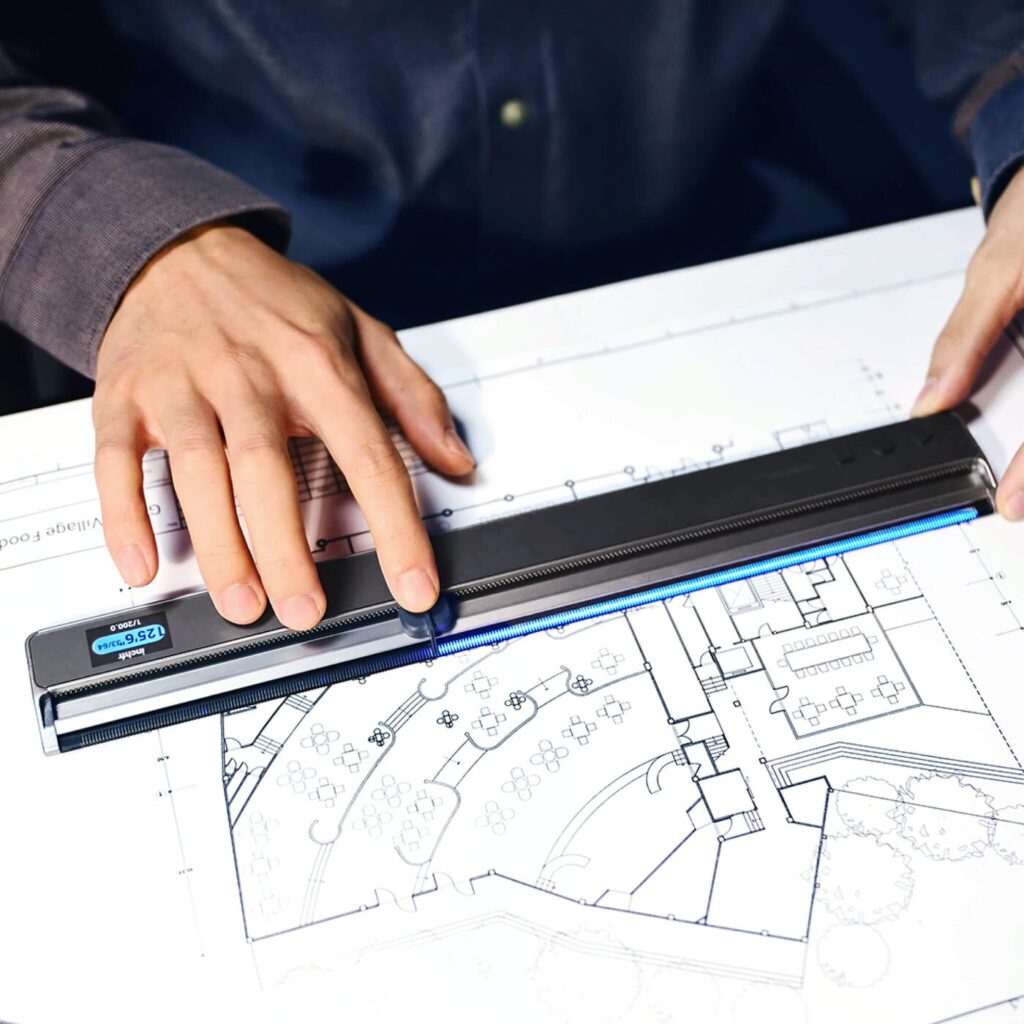
What’s In The BoxM-Cube 00 Laser Measure – already mounted on the Laser Level<br>M-Cube 02 Laser Level<br>TargetMate (accessory)<br>GripMate (accessory)<br>CenterMate (accessory)<br>USB-C to USB-A charging cable<br>Large screw adapter for the AdaptMate<br>Several quick start books## Design And Build QualityI didn’t expect to be this impressed by a laser level the moment I pulled it out of the box, but the [HOZO Design M-Cube 02 Anti-Gravity Laser Level]( ) pulled me in pretty much instantly. First was by the quality of the product itself. Solid, well built and something that wasn’t made cheaply or in a rushed amount of time. If you’re like me and want to make sure all of the things hanging on your walls within your house are level, then this product is for you in so many ways. At $149, it’s not just another gadget but more of a tool that feels smart, solid, and genuinely helpful as well as very much useful. 
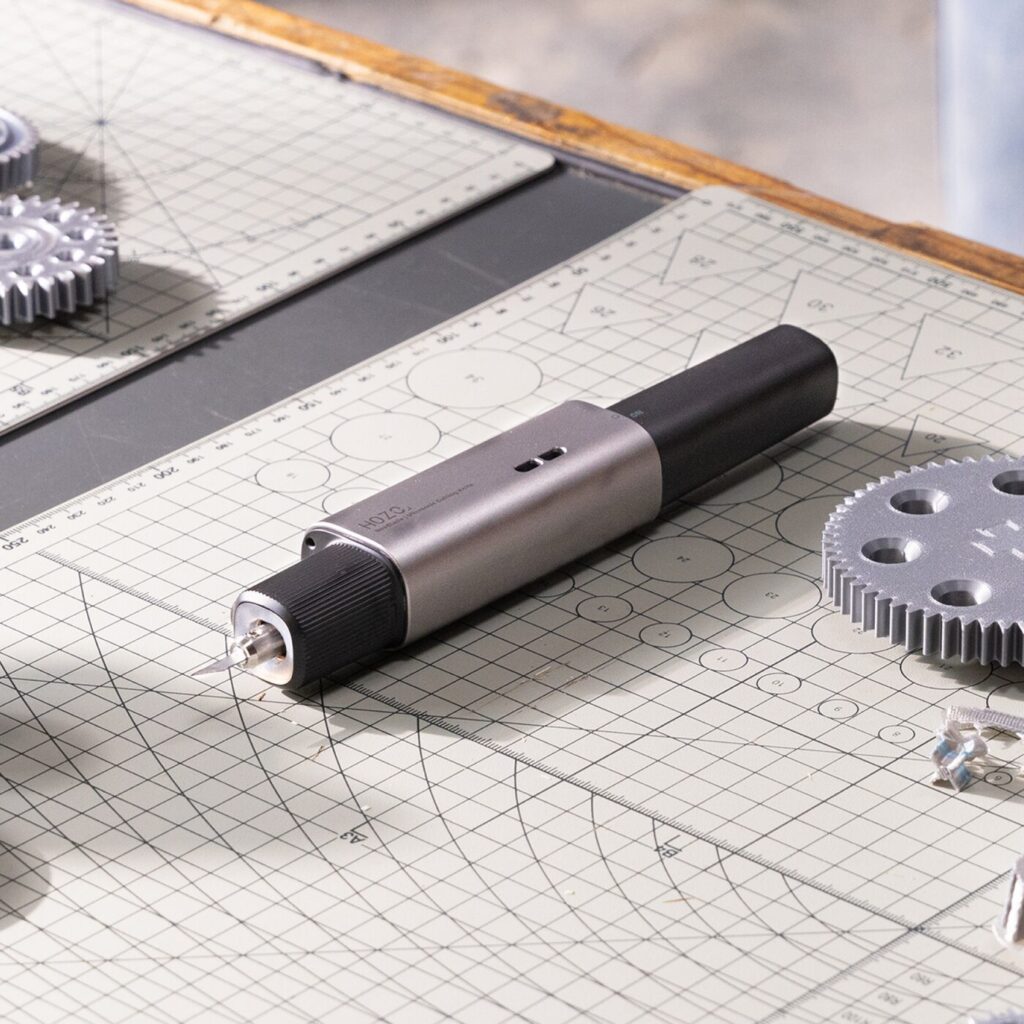
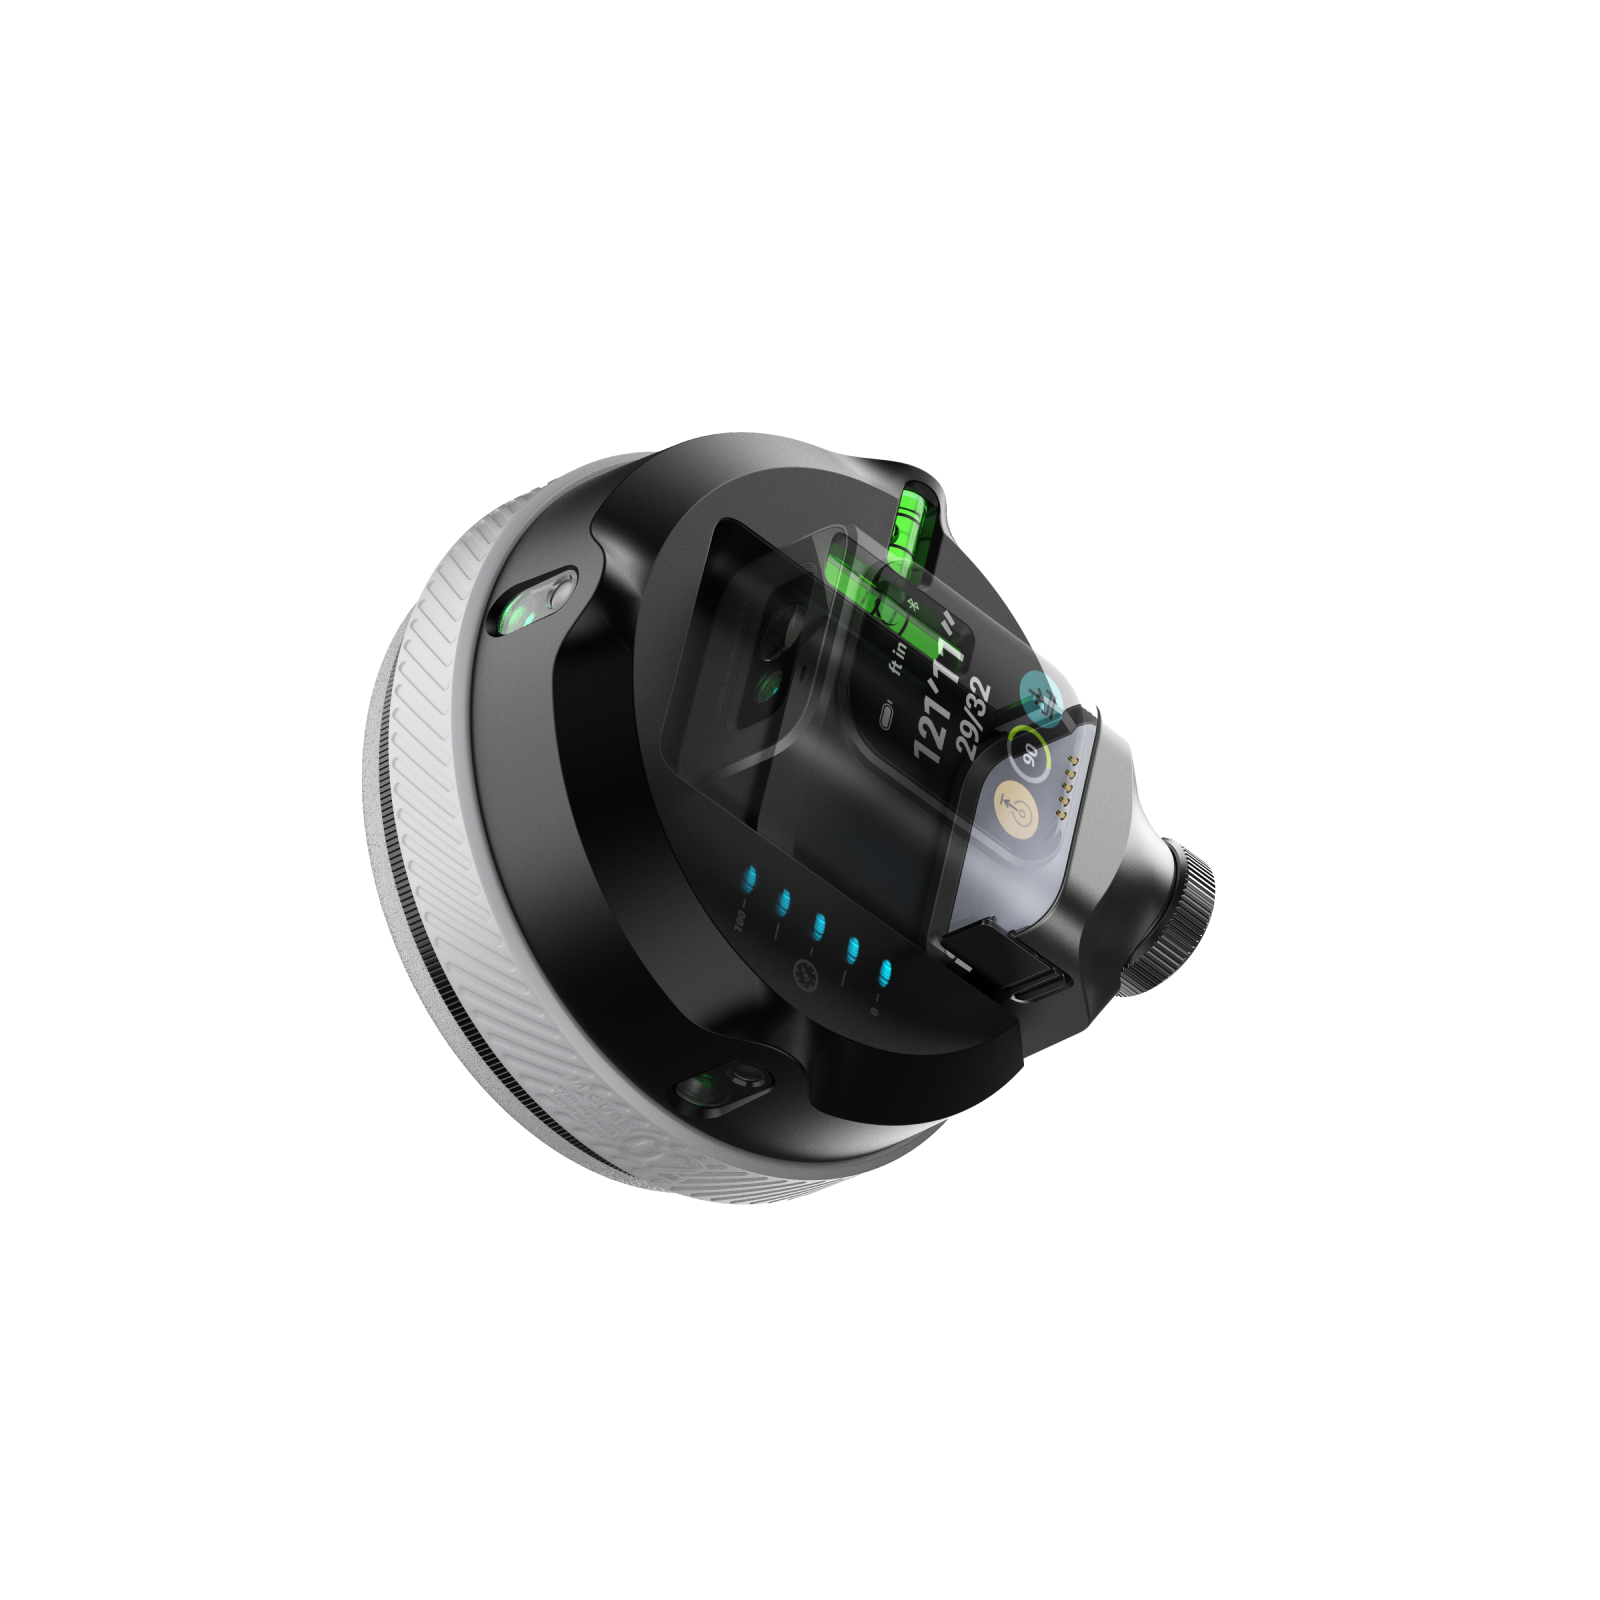
The M-Cube 02 has a compact, cube-like design, constructed from durable materials like ABS plastic, PC plastic, and aluminum alloy. Design elements include a vacuum suction pad, laser emitter, display screen, control buttons, battery indicator, Type-C charging port, modular interface, and LED indicator. The buttons on the side of the HOZO Design M-Cube 02 are very easy to press and are located in an easy to reach place on the product itself. I can’t stress enough how well thought out this product is when it comes to design and build quality.## Assembly, Installation And SetupI made sure the laser measure and Level were fully charged by plugging it in using the USB-C cable that was included in the box. I knew it was fully charged once all four LED lights lit up in a purple color. The next step was to calibrate the gryo in the laser measure. I had to remove it from the laser level and place it on a flat surface. I then went to the settings and pressed the calibrate icon, which only shows up when the measure is separated from the level. From there, I simply hit the calibrate button on the screen and followed the prompts. The next step was to place the product on its side and tap the calibrate button once again. In only a matter of seconds, the calibration was complete and I snapped the measure back to the level and was ready to start using the product. HOZO Design couldn’t have made this any simpler or quicker.## 
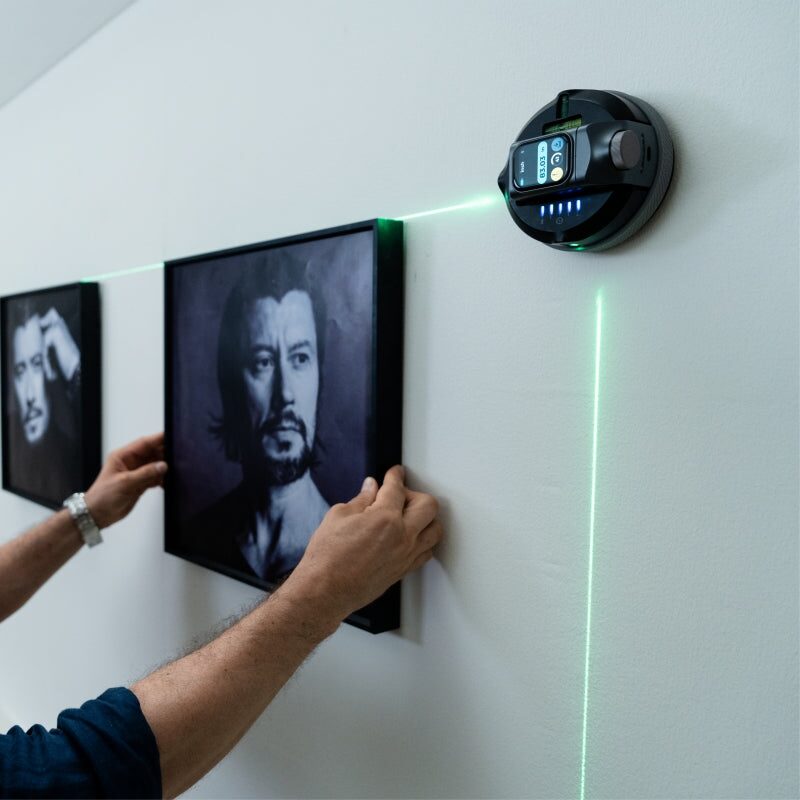
PerformanceThe first thing I did was put the product against one of my closet doors, only because I was standing right next to one and since it has a semi-gloss surface, I figured that might make it harder to stick to the surface. Much to my surprise, I placed it up there and hit the button to activate the suction and it instantly stuck to the door. I had to put absolutely no pressure of any kind. I then took it off the closet door and moved it over to the wall which has a flat surface with very minimal texture. Again, I held it up to the wall and pushed the button and just like that, it was once again stuck to the wall without applying pressure. Once it was mounted in the center of my wall, I selected the Mid-Point Finder on the screen. I had to rotate the top laser so it pointed at my first point, which I picked as the left wall. It then asked me to pick my second point which was the ceiling. The laser system is dual-color, which is a great touch. Red laser gives you tighter precision (±1/16 inch), while the green is a bit looser (±1/8 inch) but much easier to see in bright conditions. The angle accuracy sits at ±0.1°, which might sound small, but it makes a real difference when you’re aligning things like shelving or trim work. 
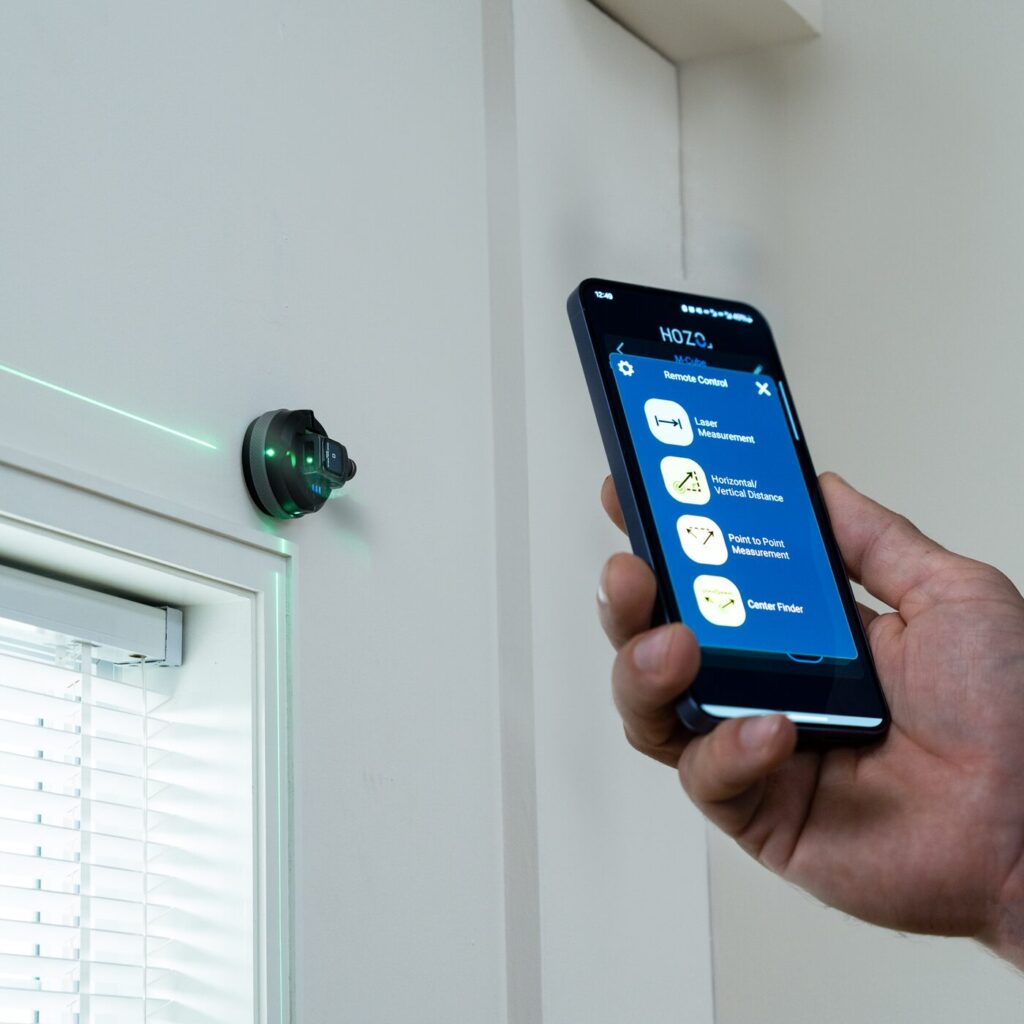
If you’ve already got the MEAZOR app, good news, it integrates with this module, giving you access to digital readouts and configuration options. It’s not essential, but it definitely adds polish to the experience.## Extra Accessories That MatterHOZO bundles in three key accessories: TargetMate, GripMate, and CenterMate. These aren’t gimmicks, they really do improve precision and make setup smoother on a wider range of surfaces. GripMate in particular is handy for slicker materials where the vacuum hold might need backup.## The MEAZOR AppThe MEAZOR app enhances the M-Cube 02’s functionality by providing remote control, real-time data display, data recording, advanced functions, firmware updates, floor plan capture (with some modules), unit conversion, and device settings customization.<strong>Remote Control</strong>: Users can control the M-Cube 02's functions directly from their smartphone or tablet, eliminating the need to physically interact with the device in many situations.<br><strong>Real-time Data Display</strong>: The app displays measurements and other data in real-time, allowing for precise adjustments and immediate feedback.<br><strong>Data Recording</strong>: Measurements can be recorded and stored within the app, facilitating documentation and reducing the risk of errors associated with manual transcription.<br><strong>Floor Plan Capture</strong>: In conjunction with compatible M-Cube modules, the app enables the creation of digital floor plans. This feature streamlines the process of surveying and mapping spaces.<br><strong>Unit Conversion</strong>: The app allows users to easily switch between different units of measurement (e.g., meters, feet, inches), increasing versatility and reducing the need for manual conversions.## Final ThoughtsThe [HOZO Design M-Cube 02]( ) isn’t just “a laser level.” It’s a precise, well-thought-out tool that respects your time and effort. It sticks to things without damaging them, saves you from extra trips up and down the ladder, and adapts to how you like to work. If you’re serious about getting things right the first time, or just want fewer crooked frames in your life, this is a worthy addition to your toolbox. At the time of this writing, the HOZO Design M-Cube 02 costs $149 USD which to me is a great price for what it does and everything it offers. While I haven’t looked specifically for this type of thing in stores, my guess is that something similar with as good quality as this would likely be closer to $300 USD. ## 
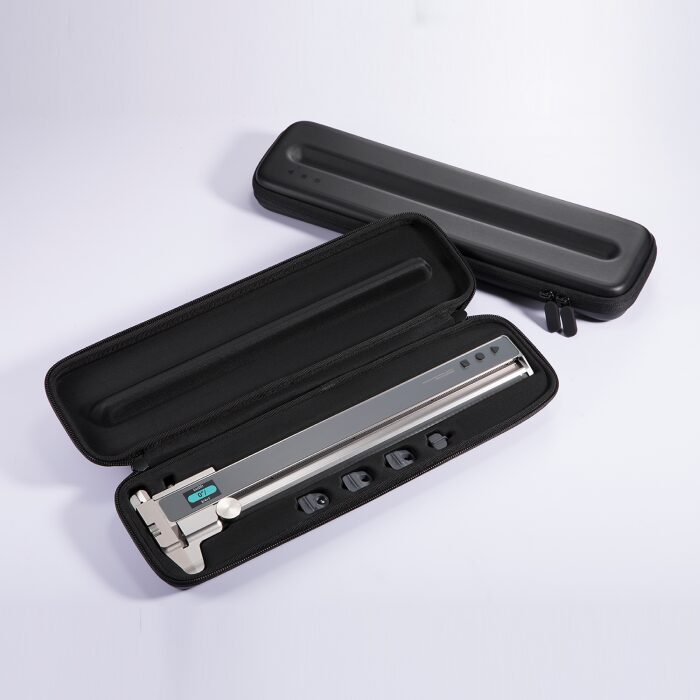
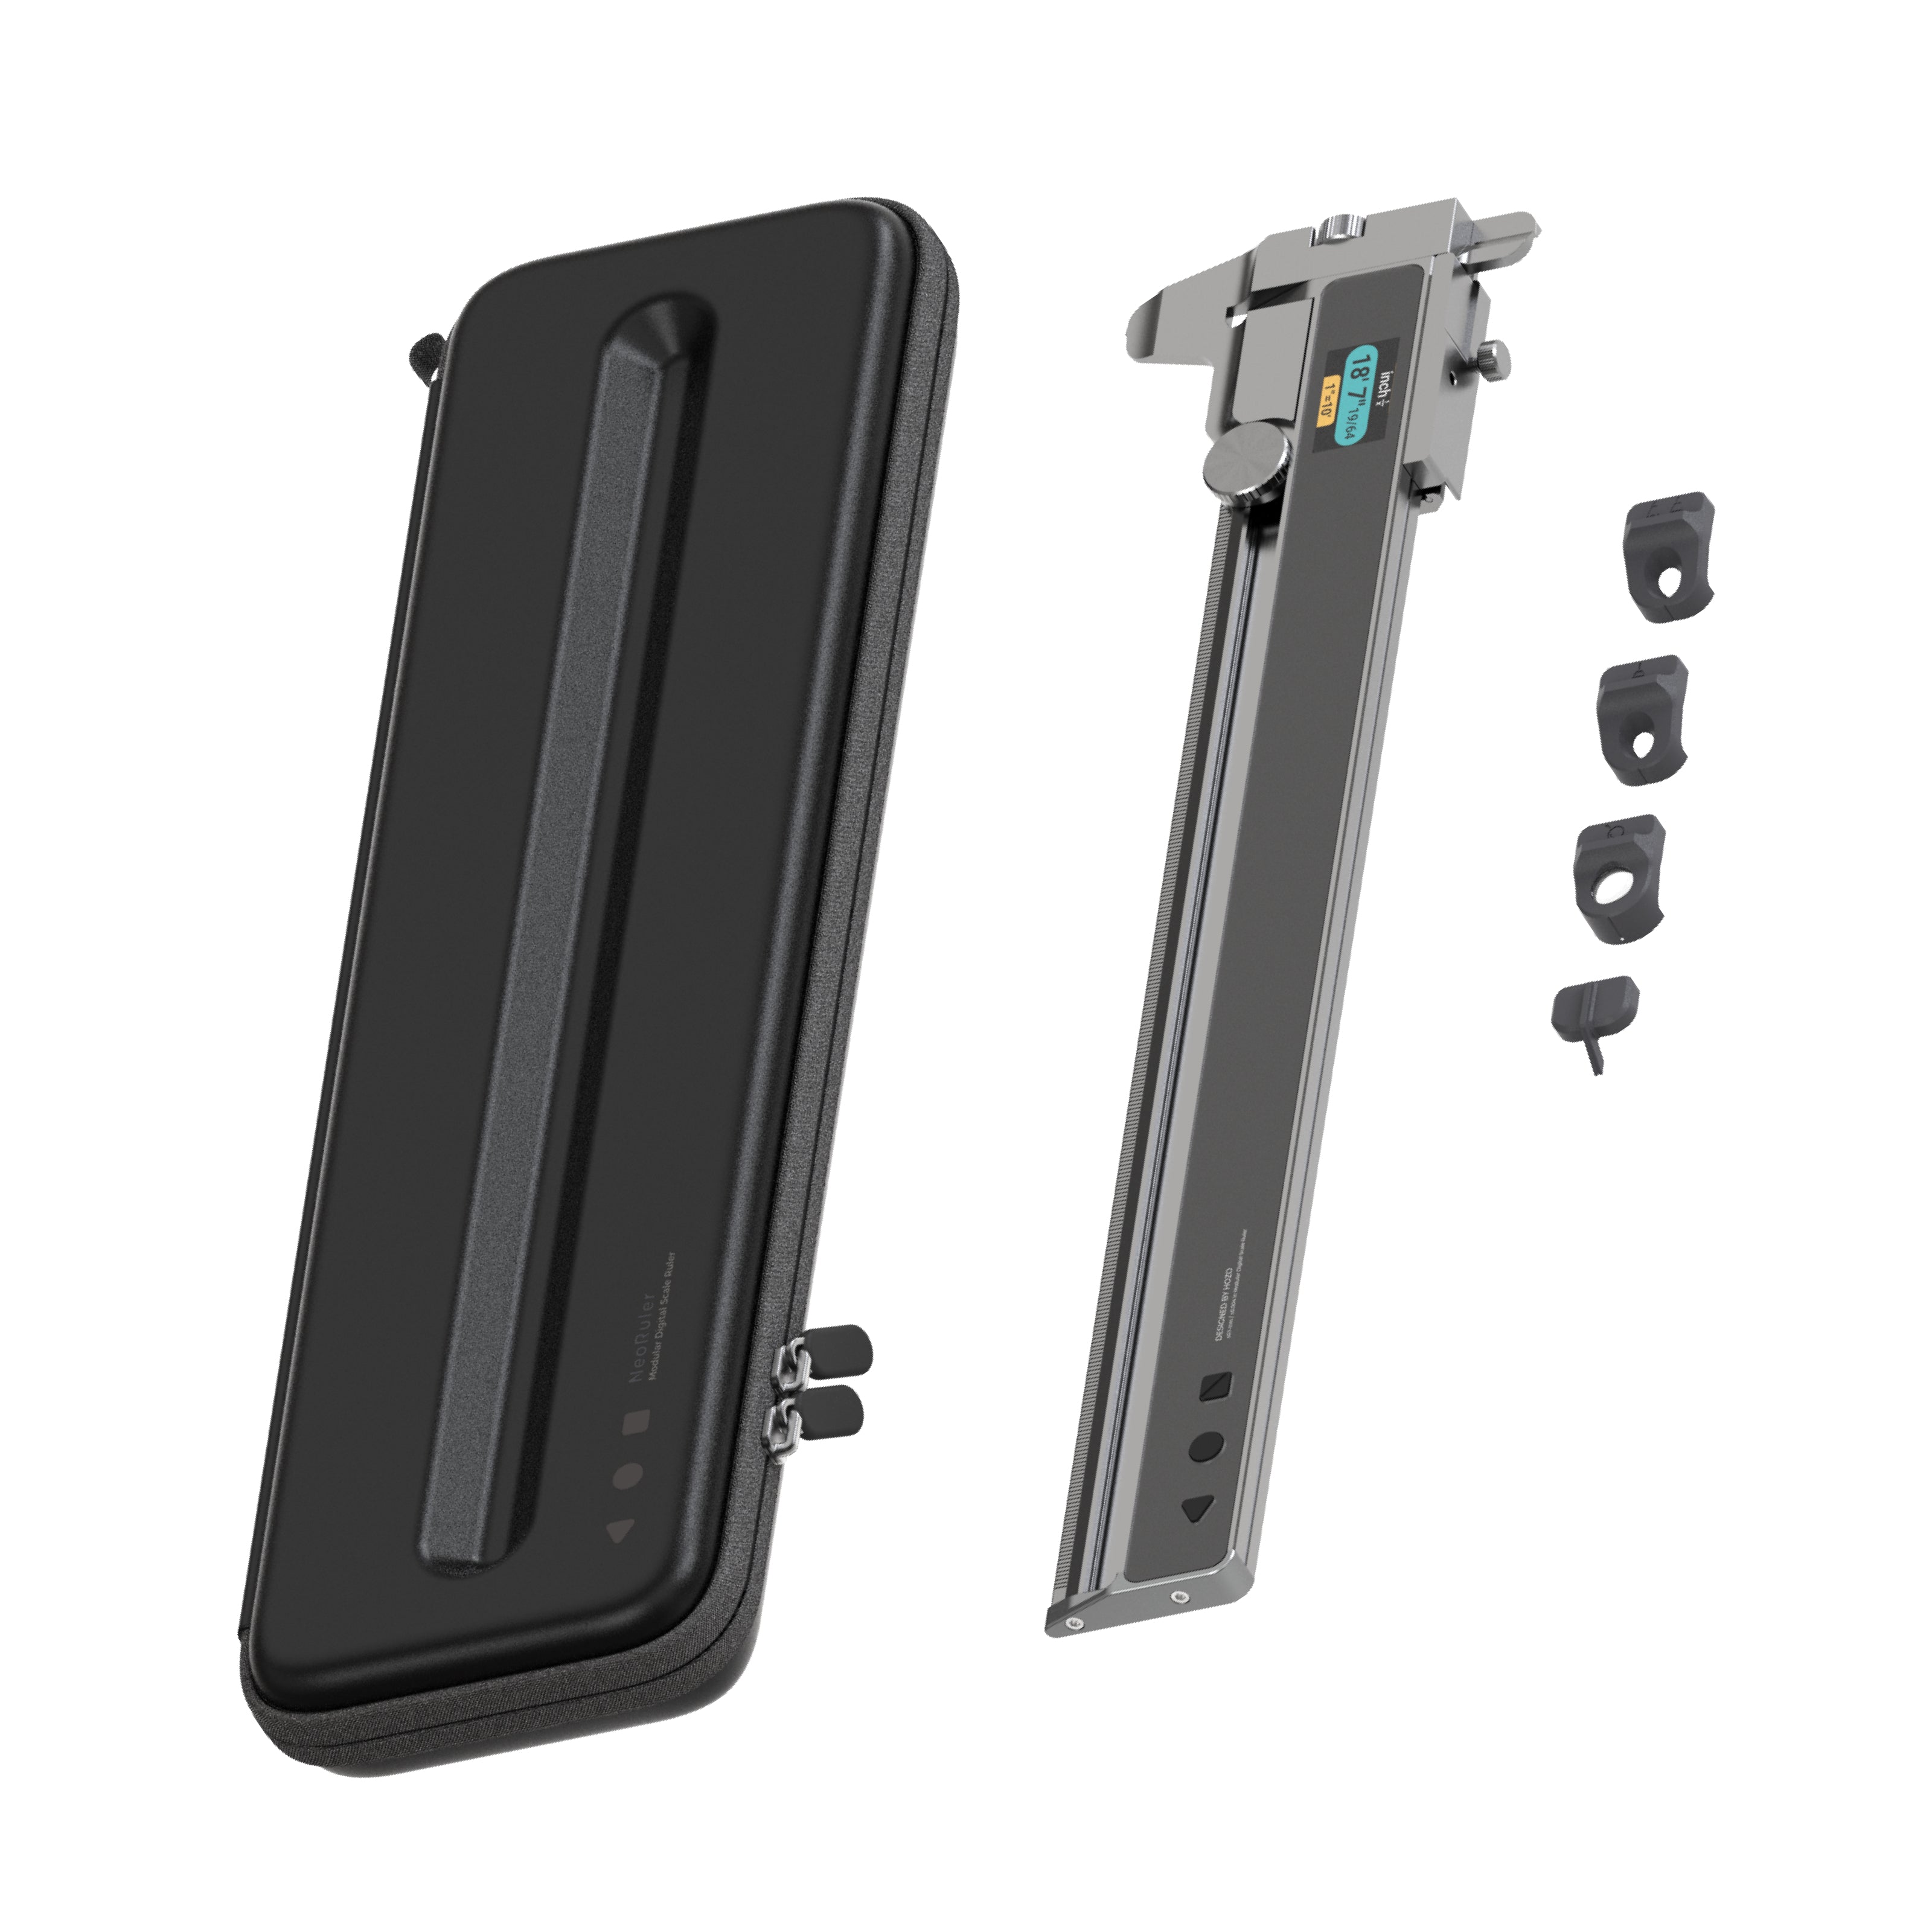
Other Products By HOZO DesignThe awesome folks at HOZO Design also sent me their [NeoRuler]( ) to review. I haven’t had much time with it as of yet, but hoping to do so this coming week, which means the following week I should have the review of that product published here as well. So keep your eyes peeled to the site for that review. I can give you a quick heads up, it’s yet another very well product what little bit I’ve used it so far. #AntiGravity #HOZODesign #LaserLevel #LaserMeasure #Level #MCube02 #Reviews #SmartLevel #Technology
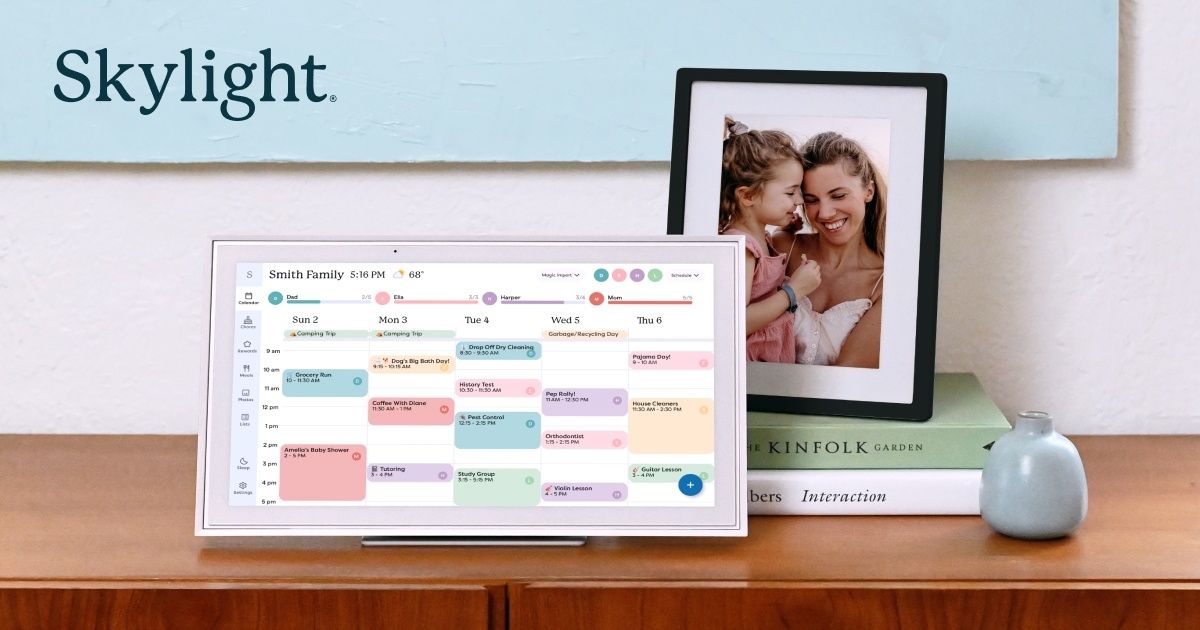